Best Hikes in Zion National Park
In 2020, we spent Thanksgiving at Zion National Park. Although we have experienced many more parks, sights, and hikes since then, Zion remains one of my favorite places. Maybe that’s because it was the first National Park that Ethan and I visited together and the first “big” trip that we took after establishing Go There Do That. Maybe it’s because Zion was made even more beautiful canopied in yellow and orange as the leaves changed color during our stay. Honestly though, I think the most significant reason that Zion is forever etched in my memory and held with such high regard is because it’s the place where I realized how much I love hiking.
What I look for in an ideal hike changes with my mood and motivation from day to day. Sometimes I’m looking for an adrenaline rush and a challenge. Sometimes I just want to connect with nature and find a quiet spot. And sometimes I think of a hike as only the necessary gateway to enjoy a spectacular view. Zion provided all of those conditions in a variety of trails. I would find it very difficult to create a top 5 ranking of sorts for the best hikes in Zion since I enjoyed them for very different reasons. Instead, I’ll share which mood and motivation each hike nurtured, so you can decide what hikes would be most enjoyed by you.

If you are visiting Zion from March to November, you will have to ride the shuttle (or hike an extra bajillion miles) to get to many of the most popular trails in the park. Be sure to check the shuttle schedule here when planning your hikes.
Best Hike for an Adrenaline Rush
Angel’s Landing
Distance: 5 mi out and back - Time: 5 hours - Elevation Gain: 1,604 ft - Difficulty: Hard
Description:
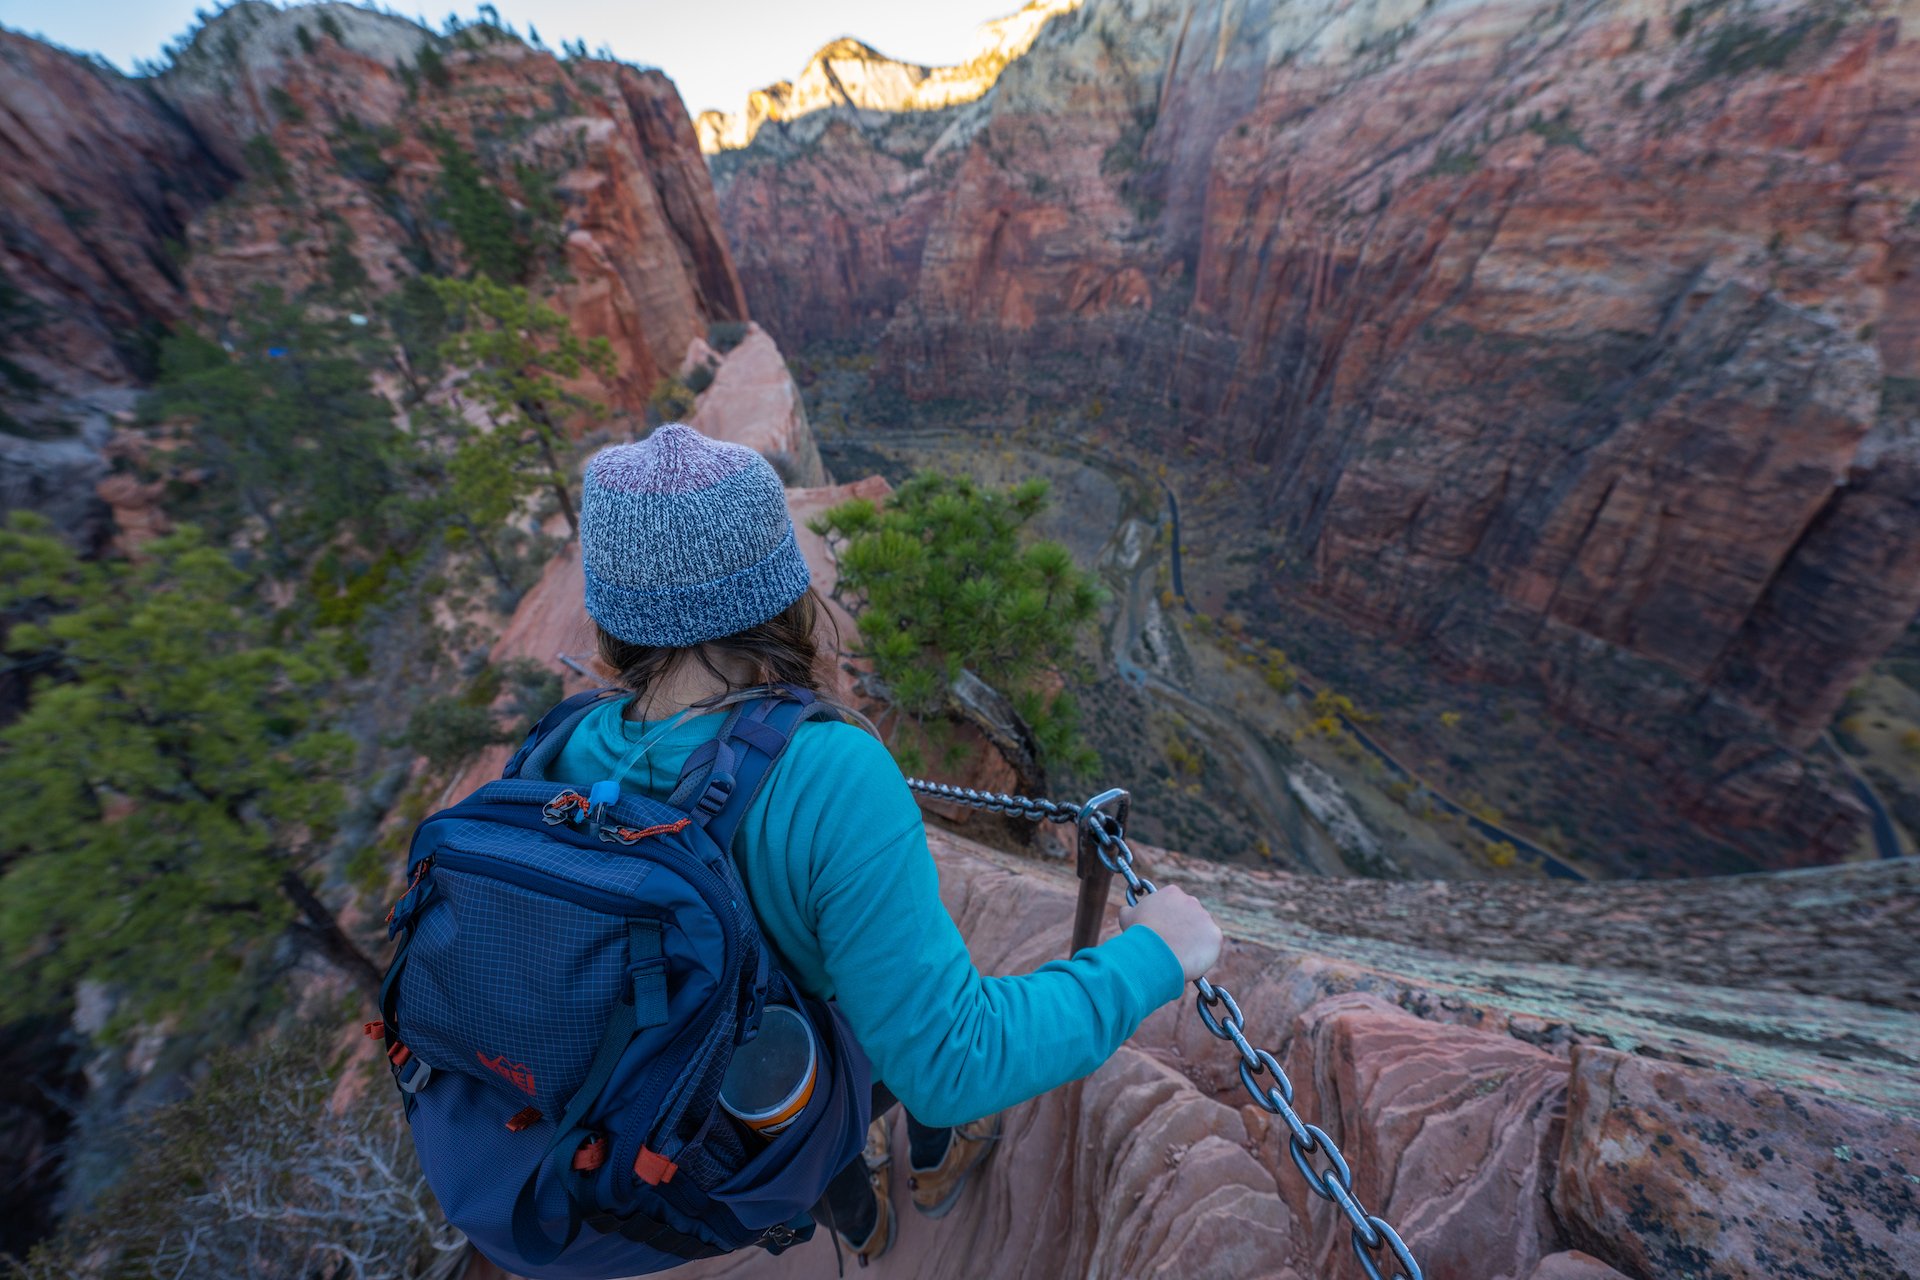
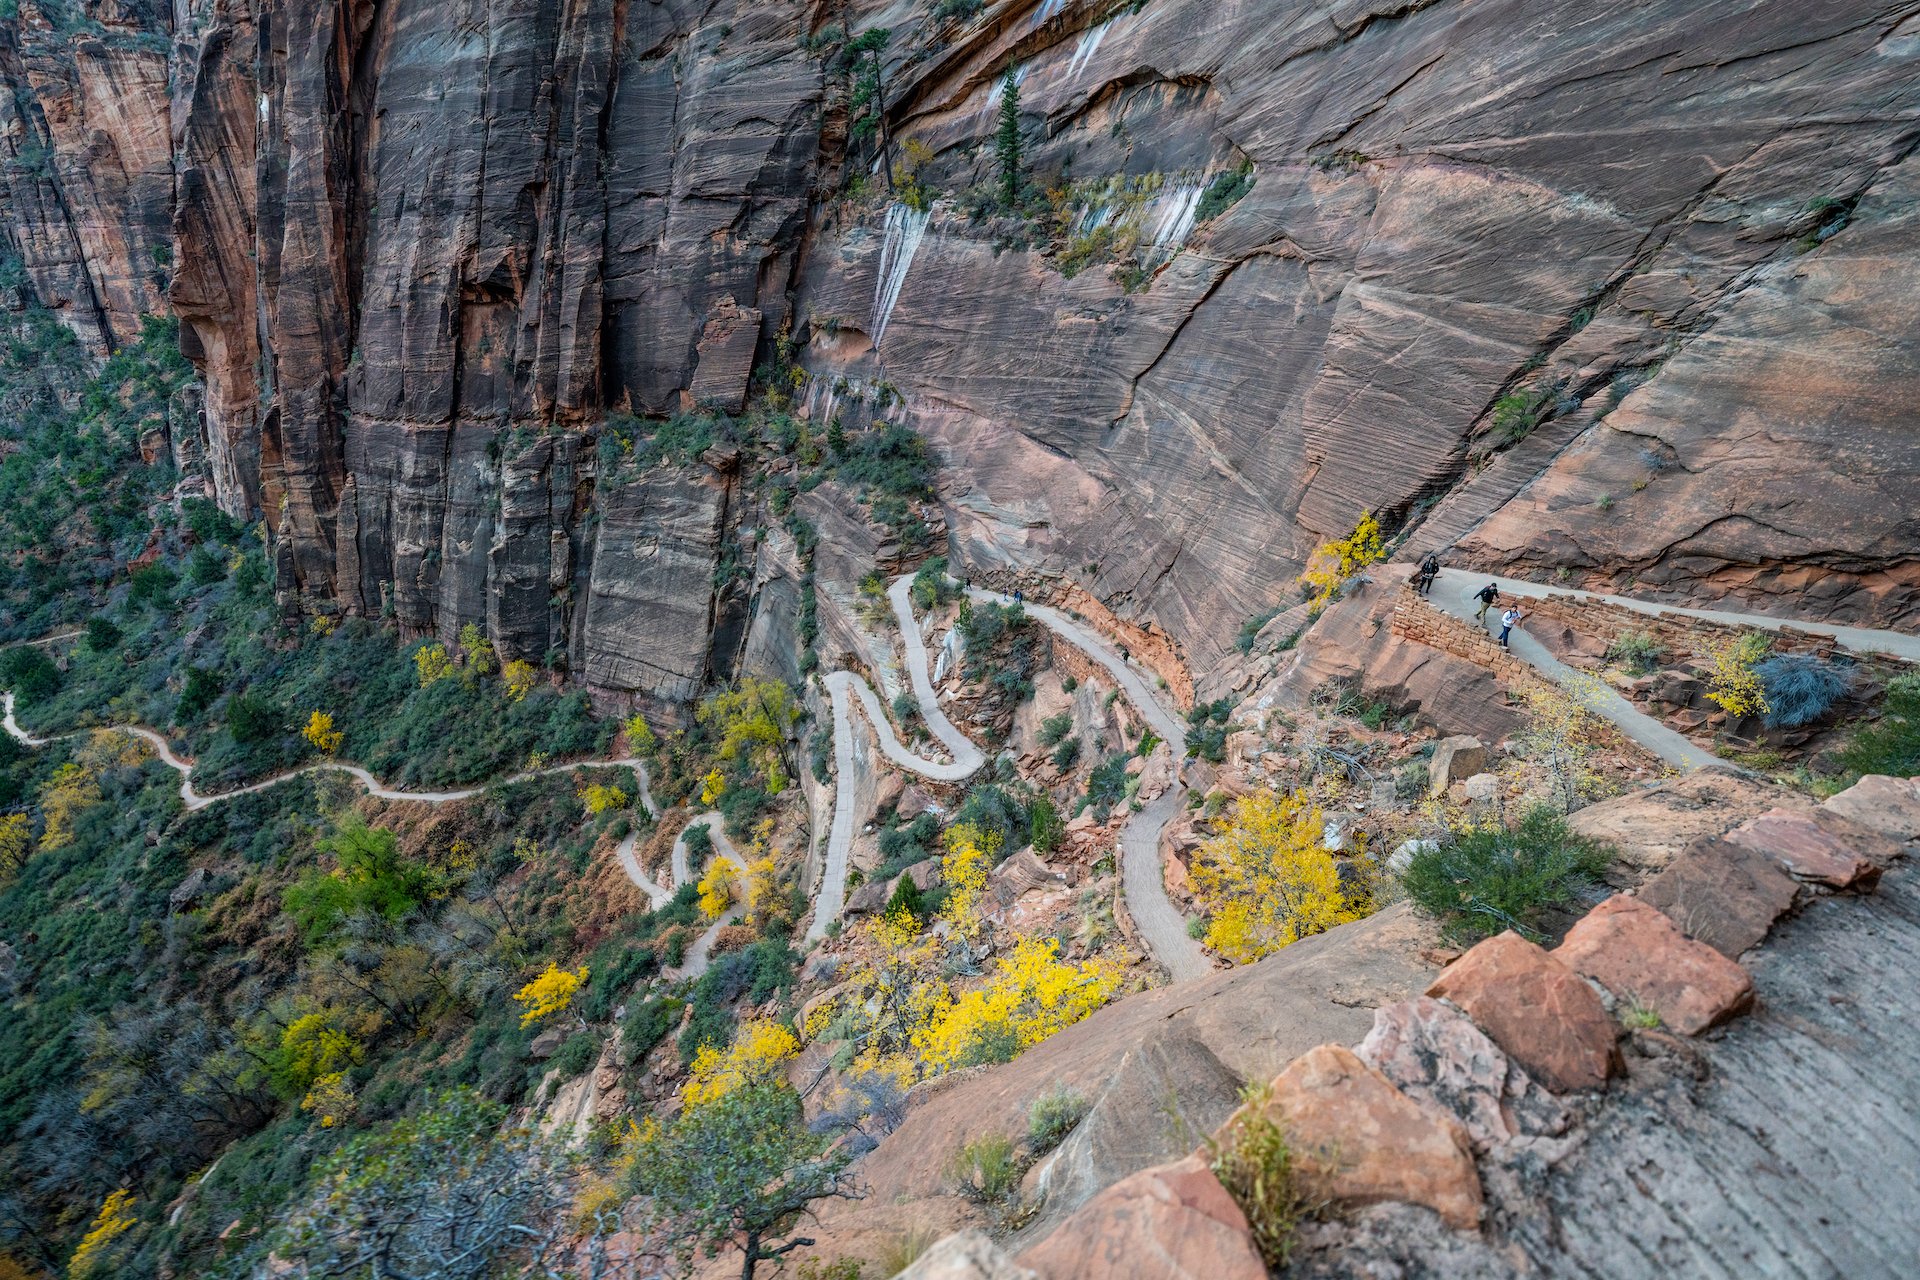
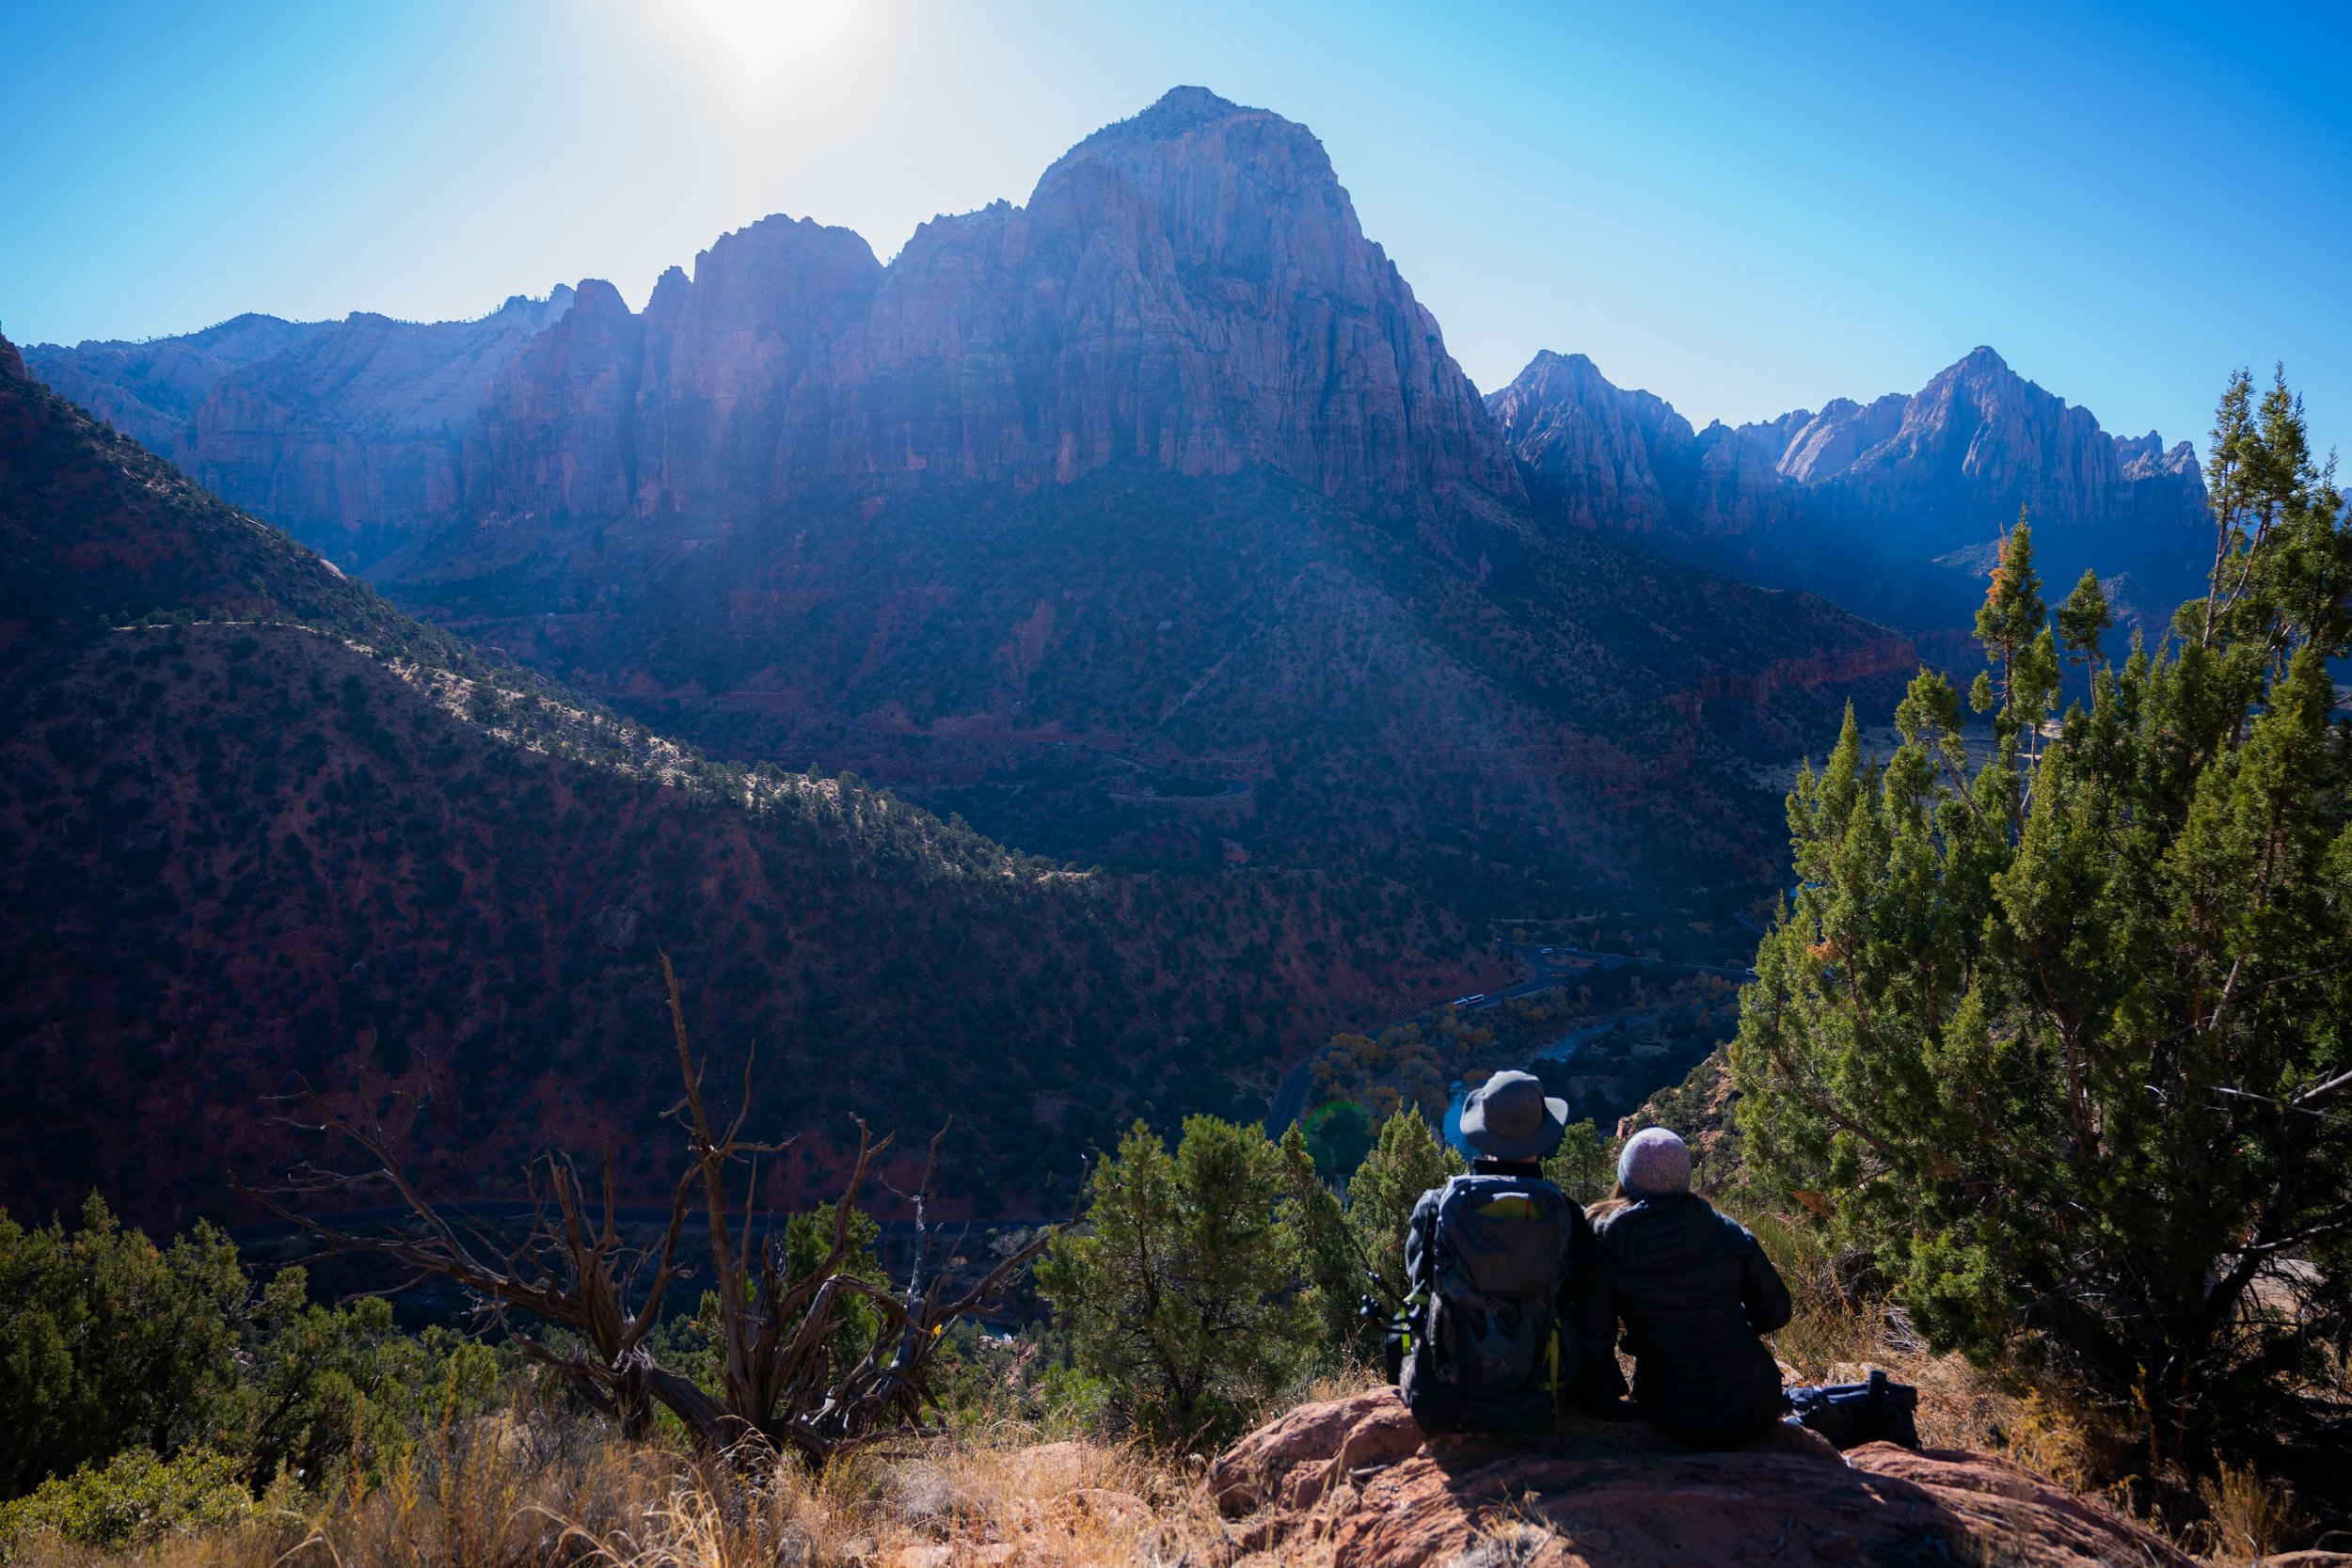
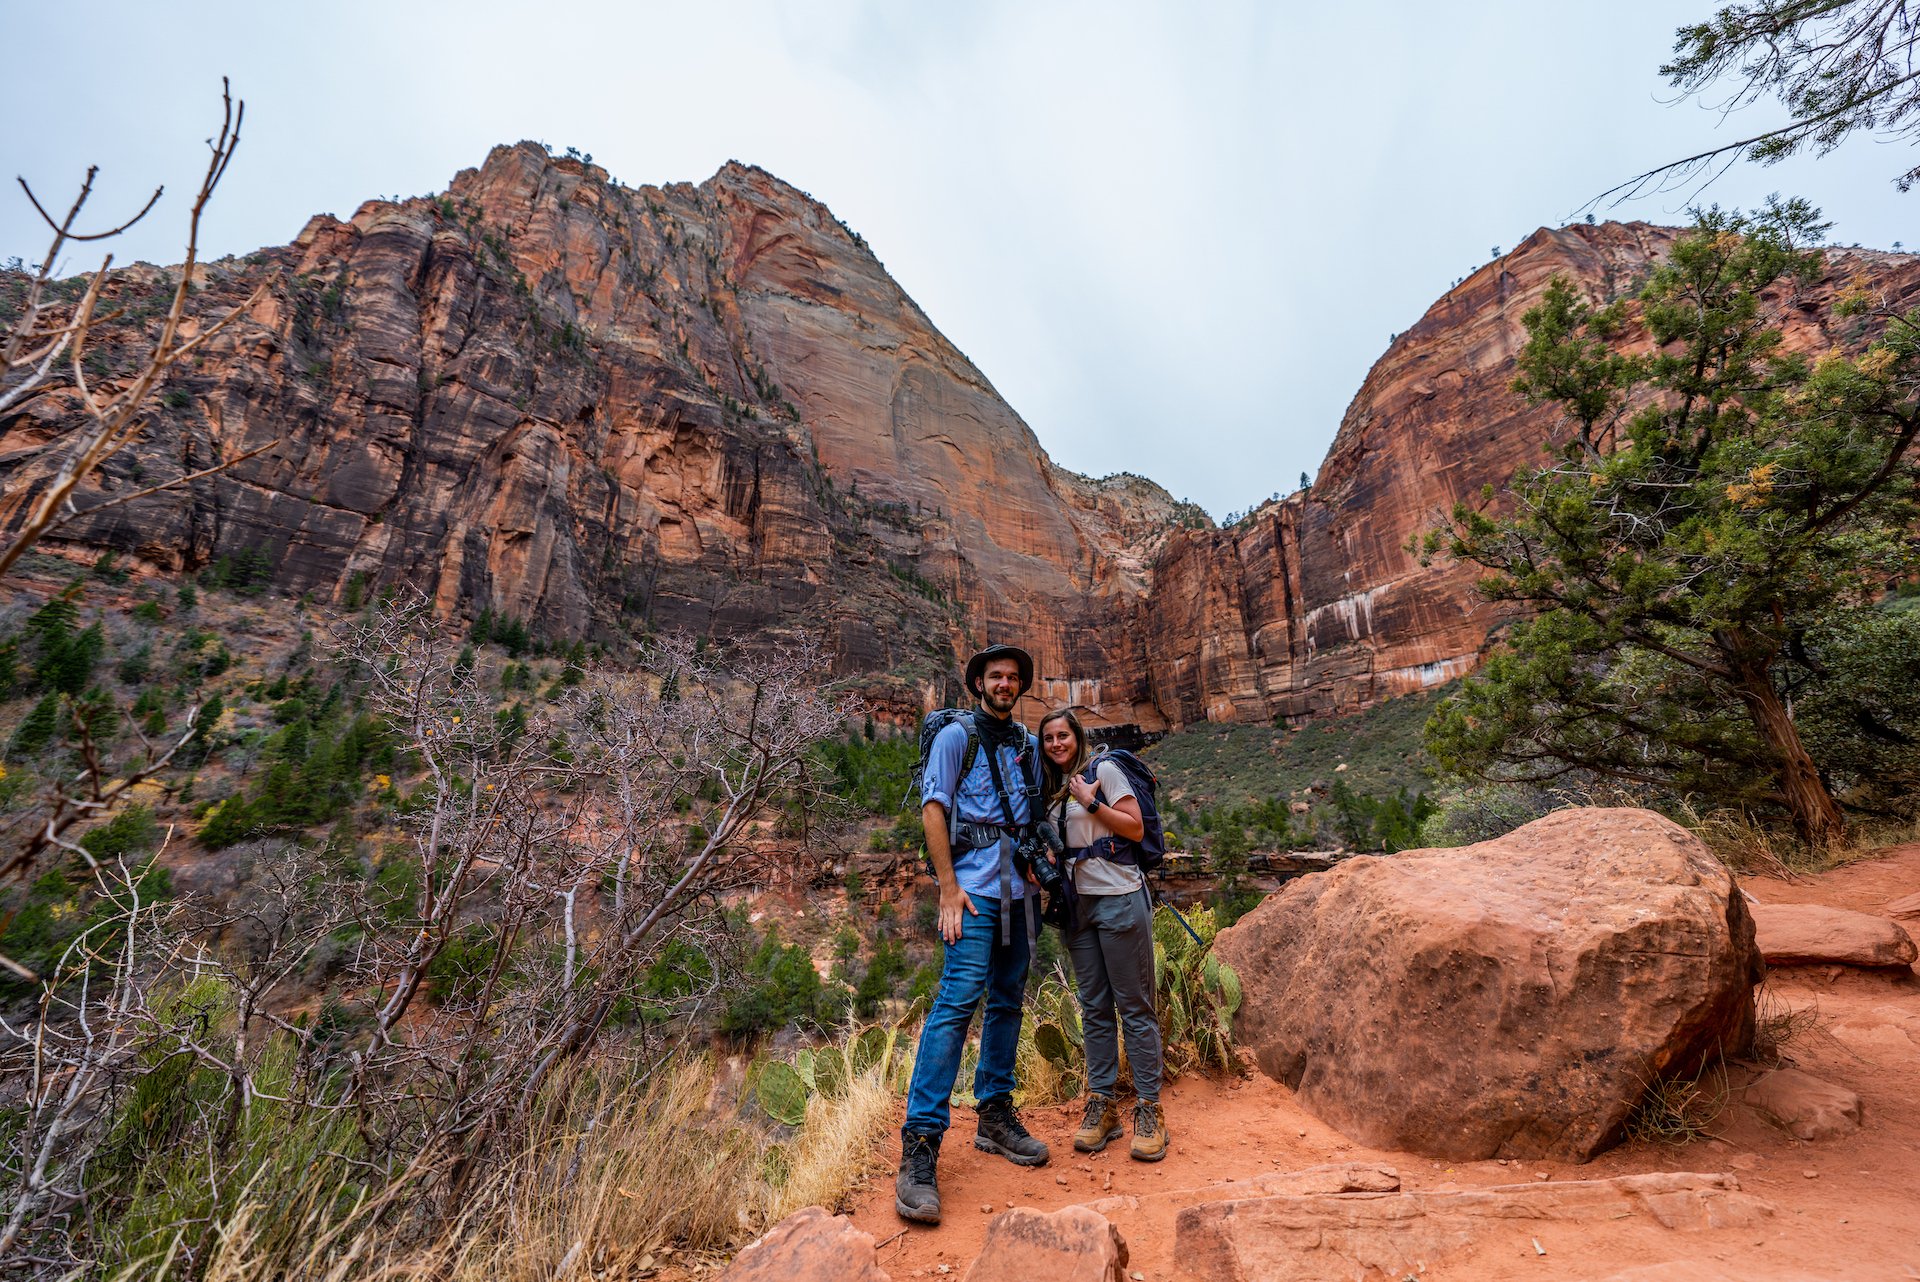
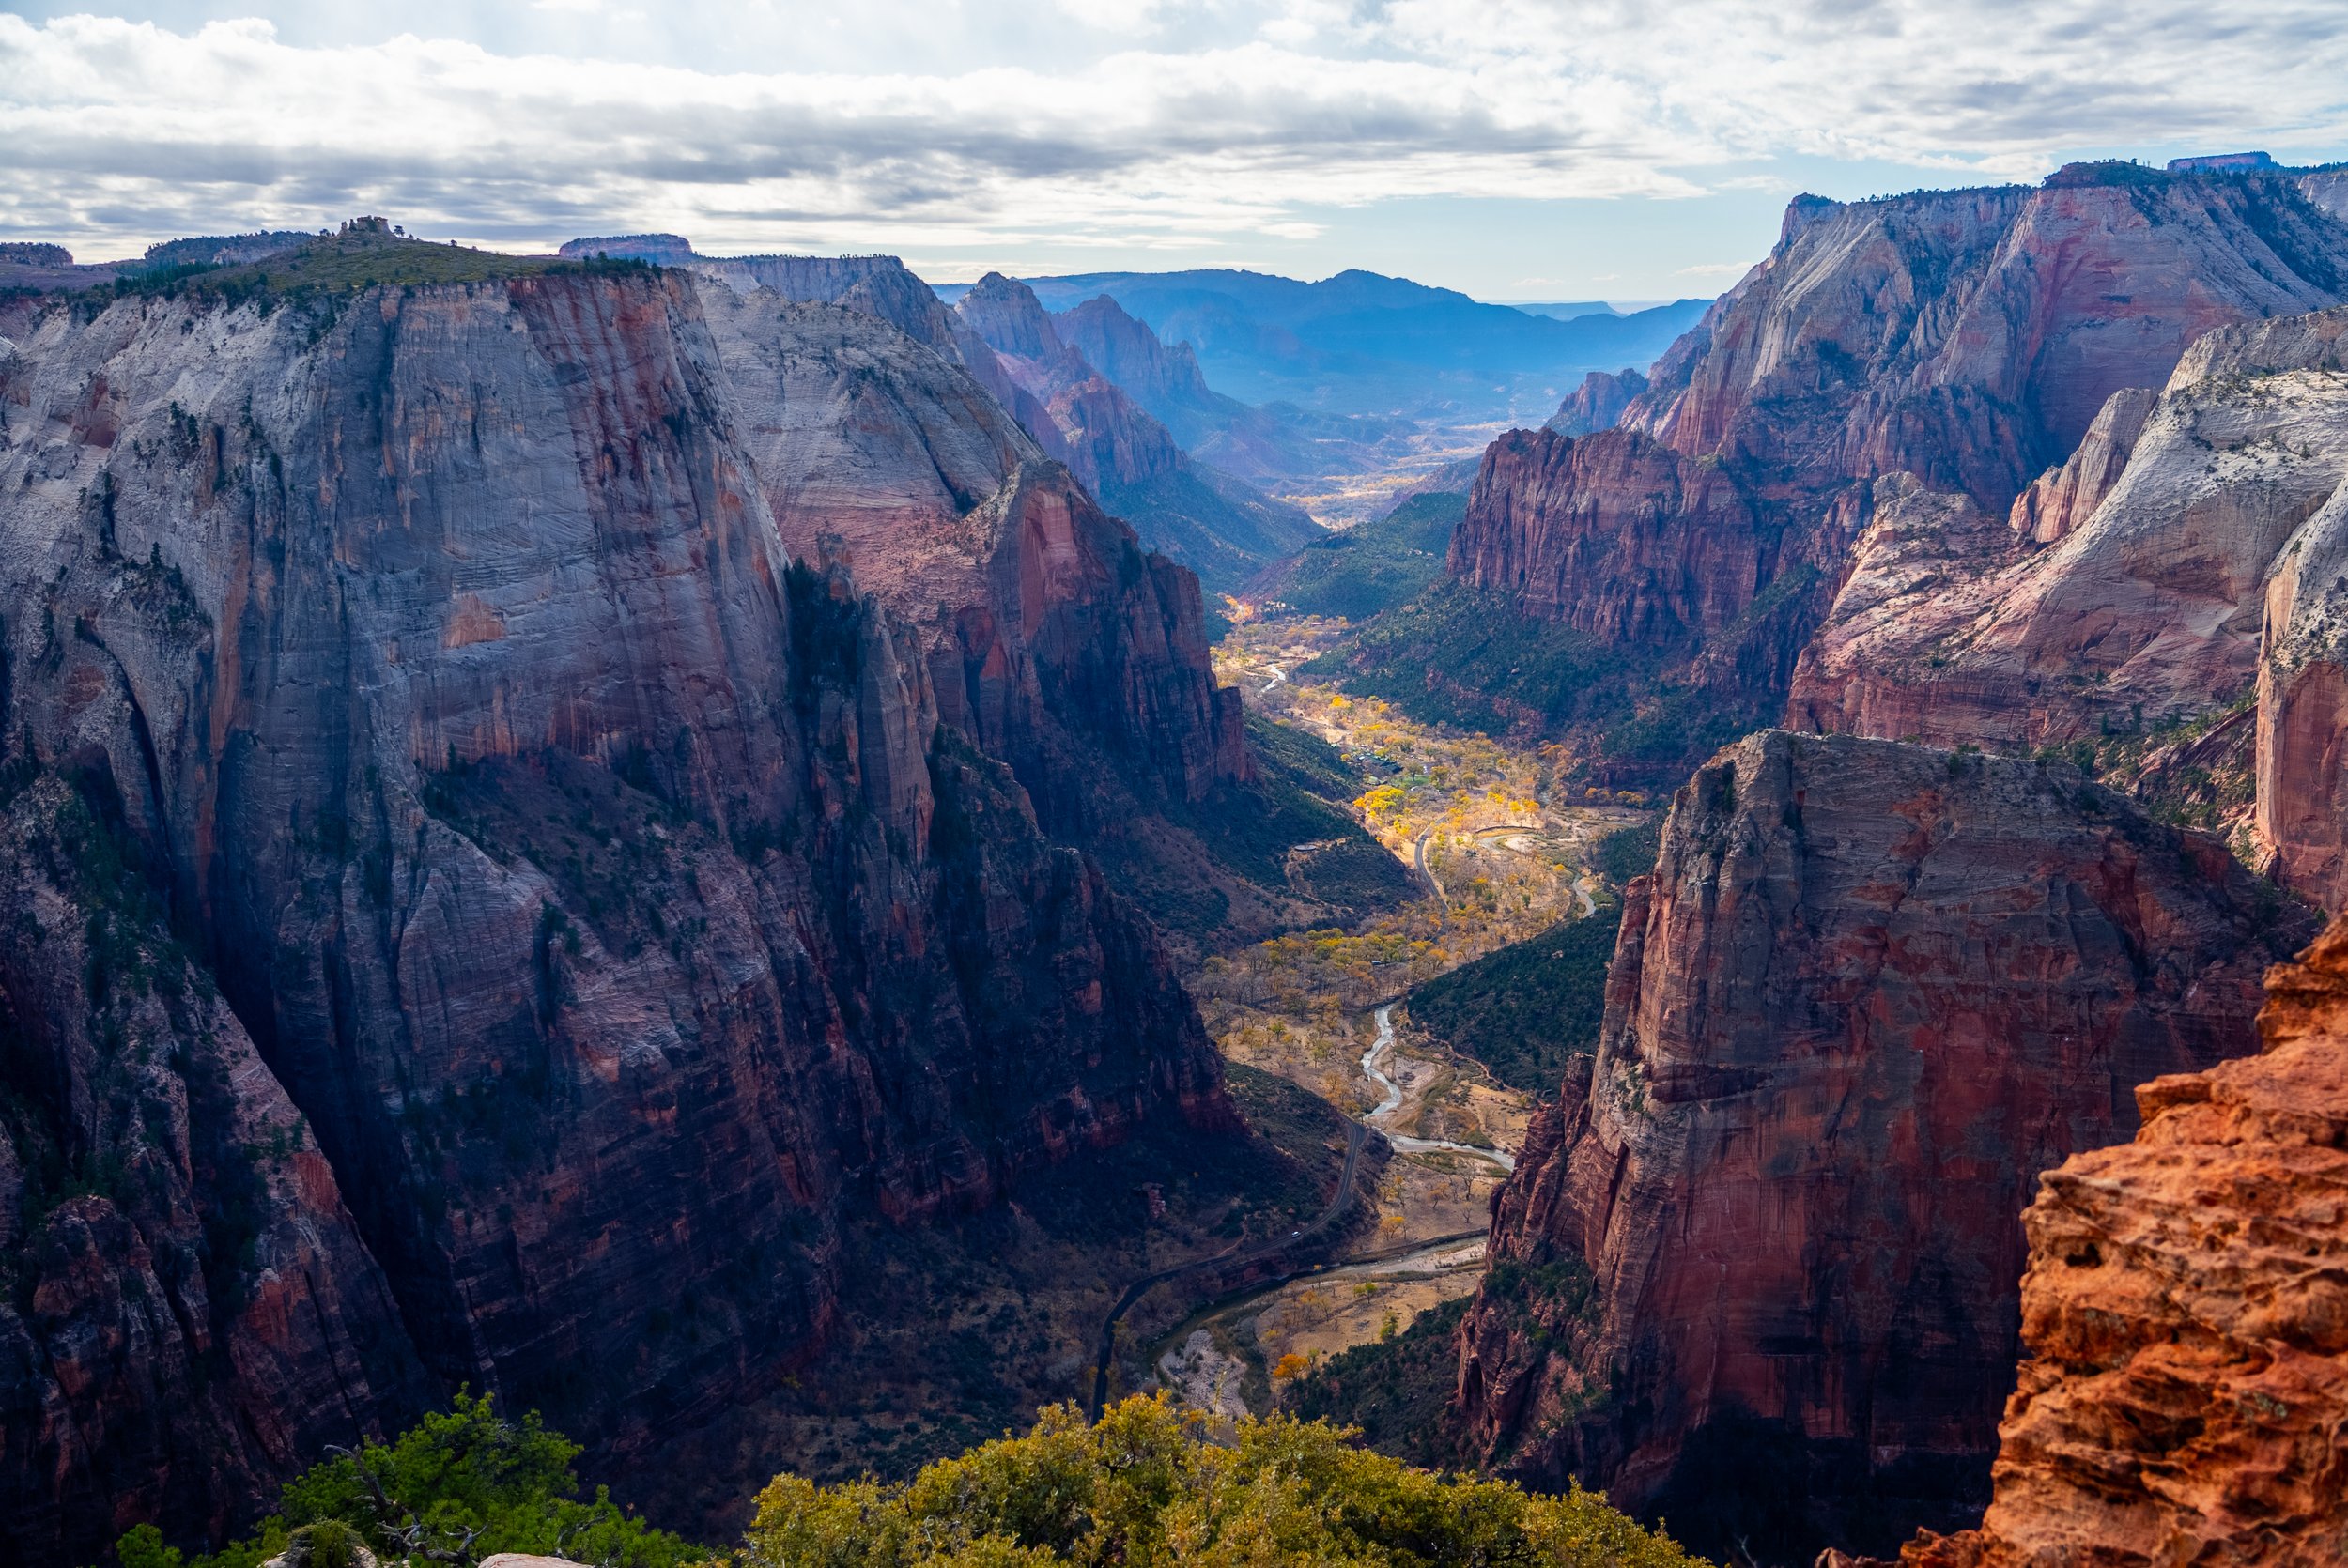
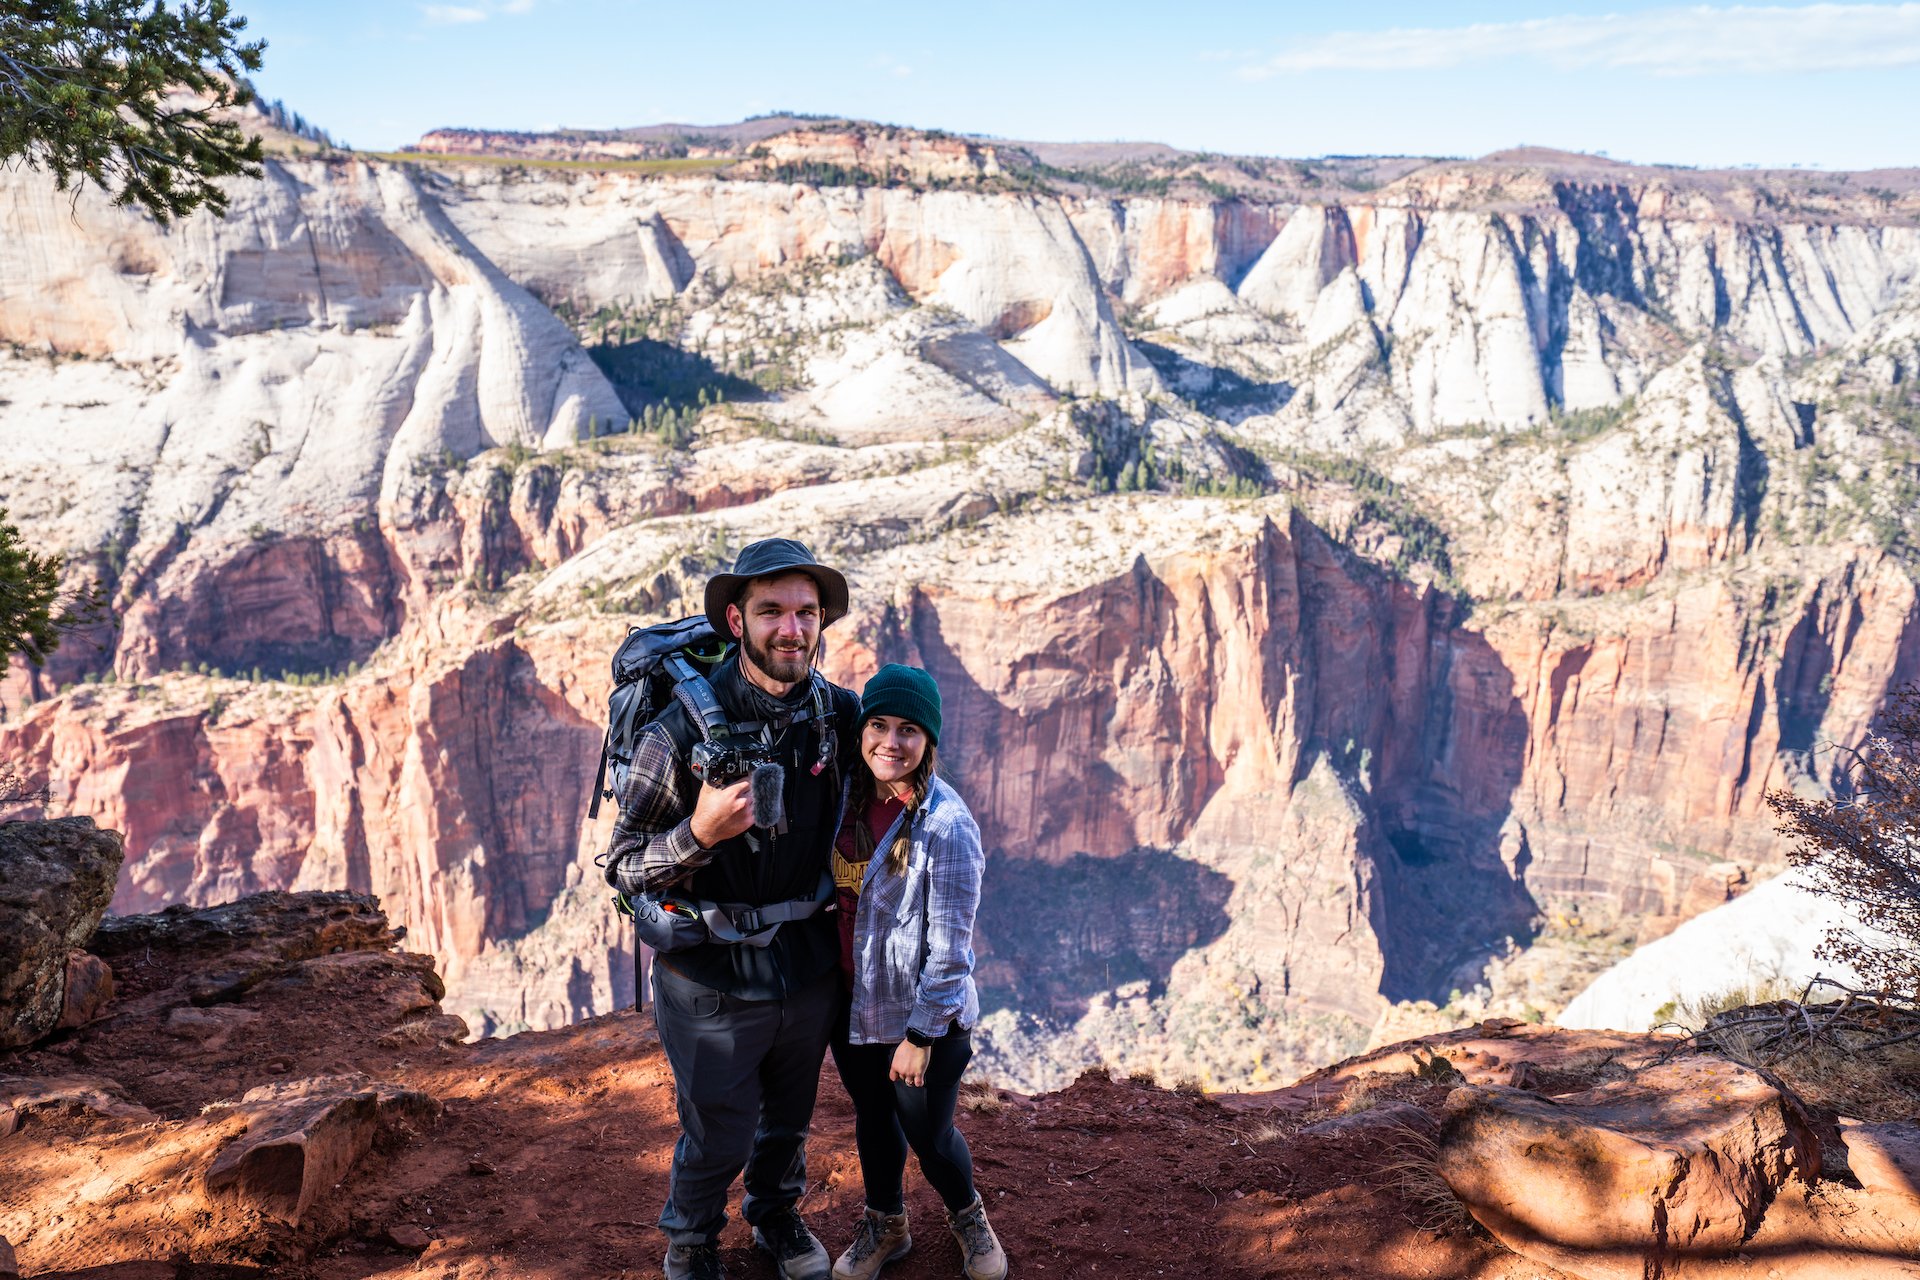
Angel’s Landing itself is really only about a half mile hike. There are support chains along the route to help maintain balance, but you actually don’t have to drag yourself up the chains to get to the top like I had imagined when we first saw them. We started at the Grotto Trailhead and merged onto West Rim Trail. Eventually we made our way up the 21 switchbacks that make up Walter’s Wiggles and eventually made it to Scout Lookout which provides an incredible view of the canyon floor. This is where I hyped myself up and made the decision to hike up the last half mile up to Angel’s Landing Summit instead of letting fear take over. I rate this as a hard hike because of elevation gain, length, and the necessary inner pep talk needed to take on the summit.
Experience:
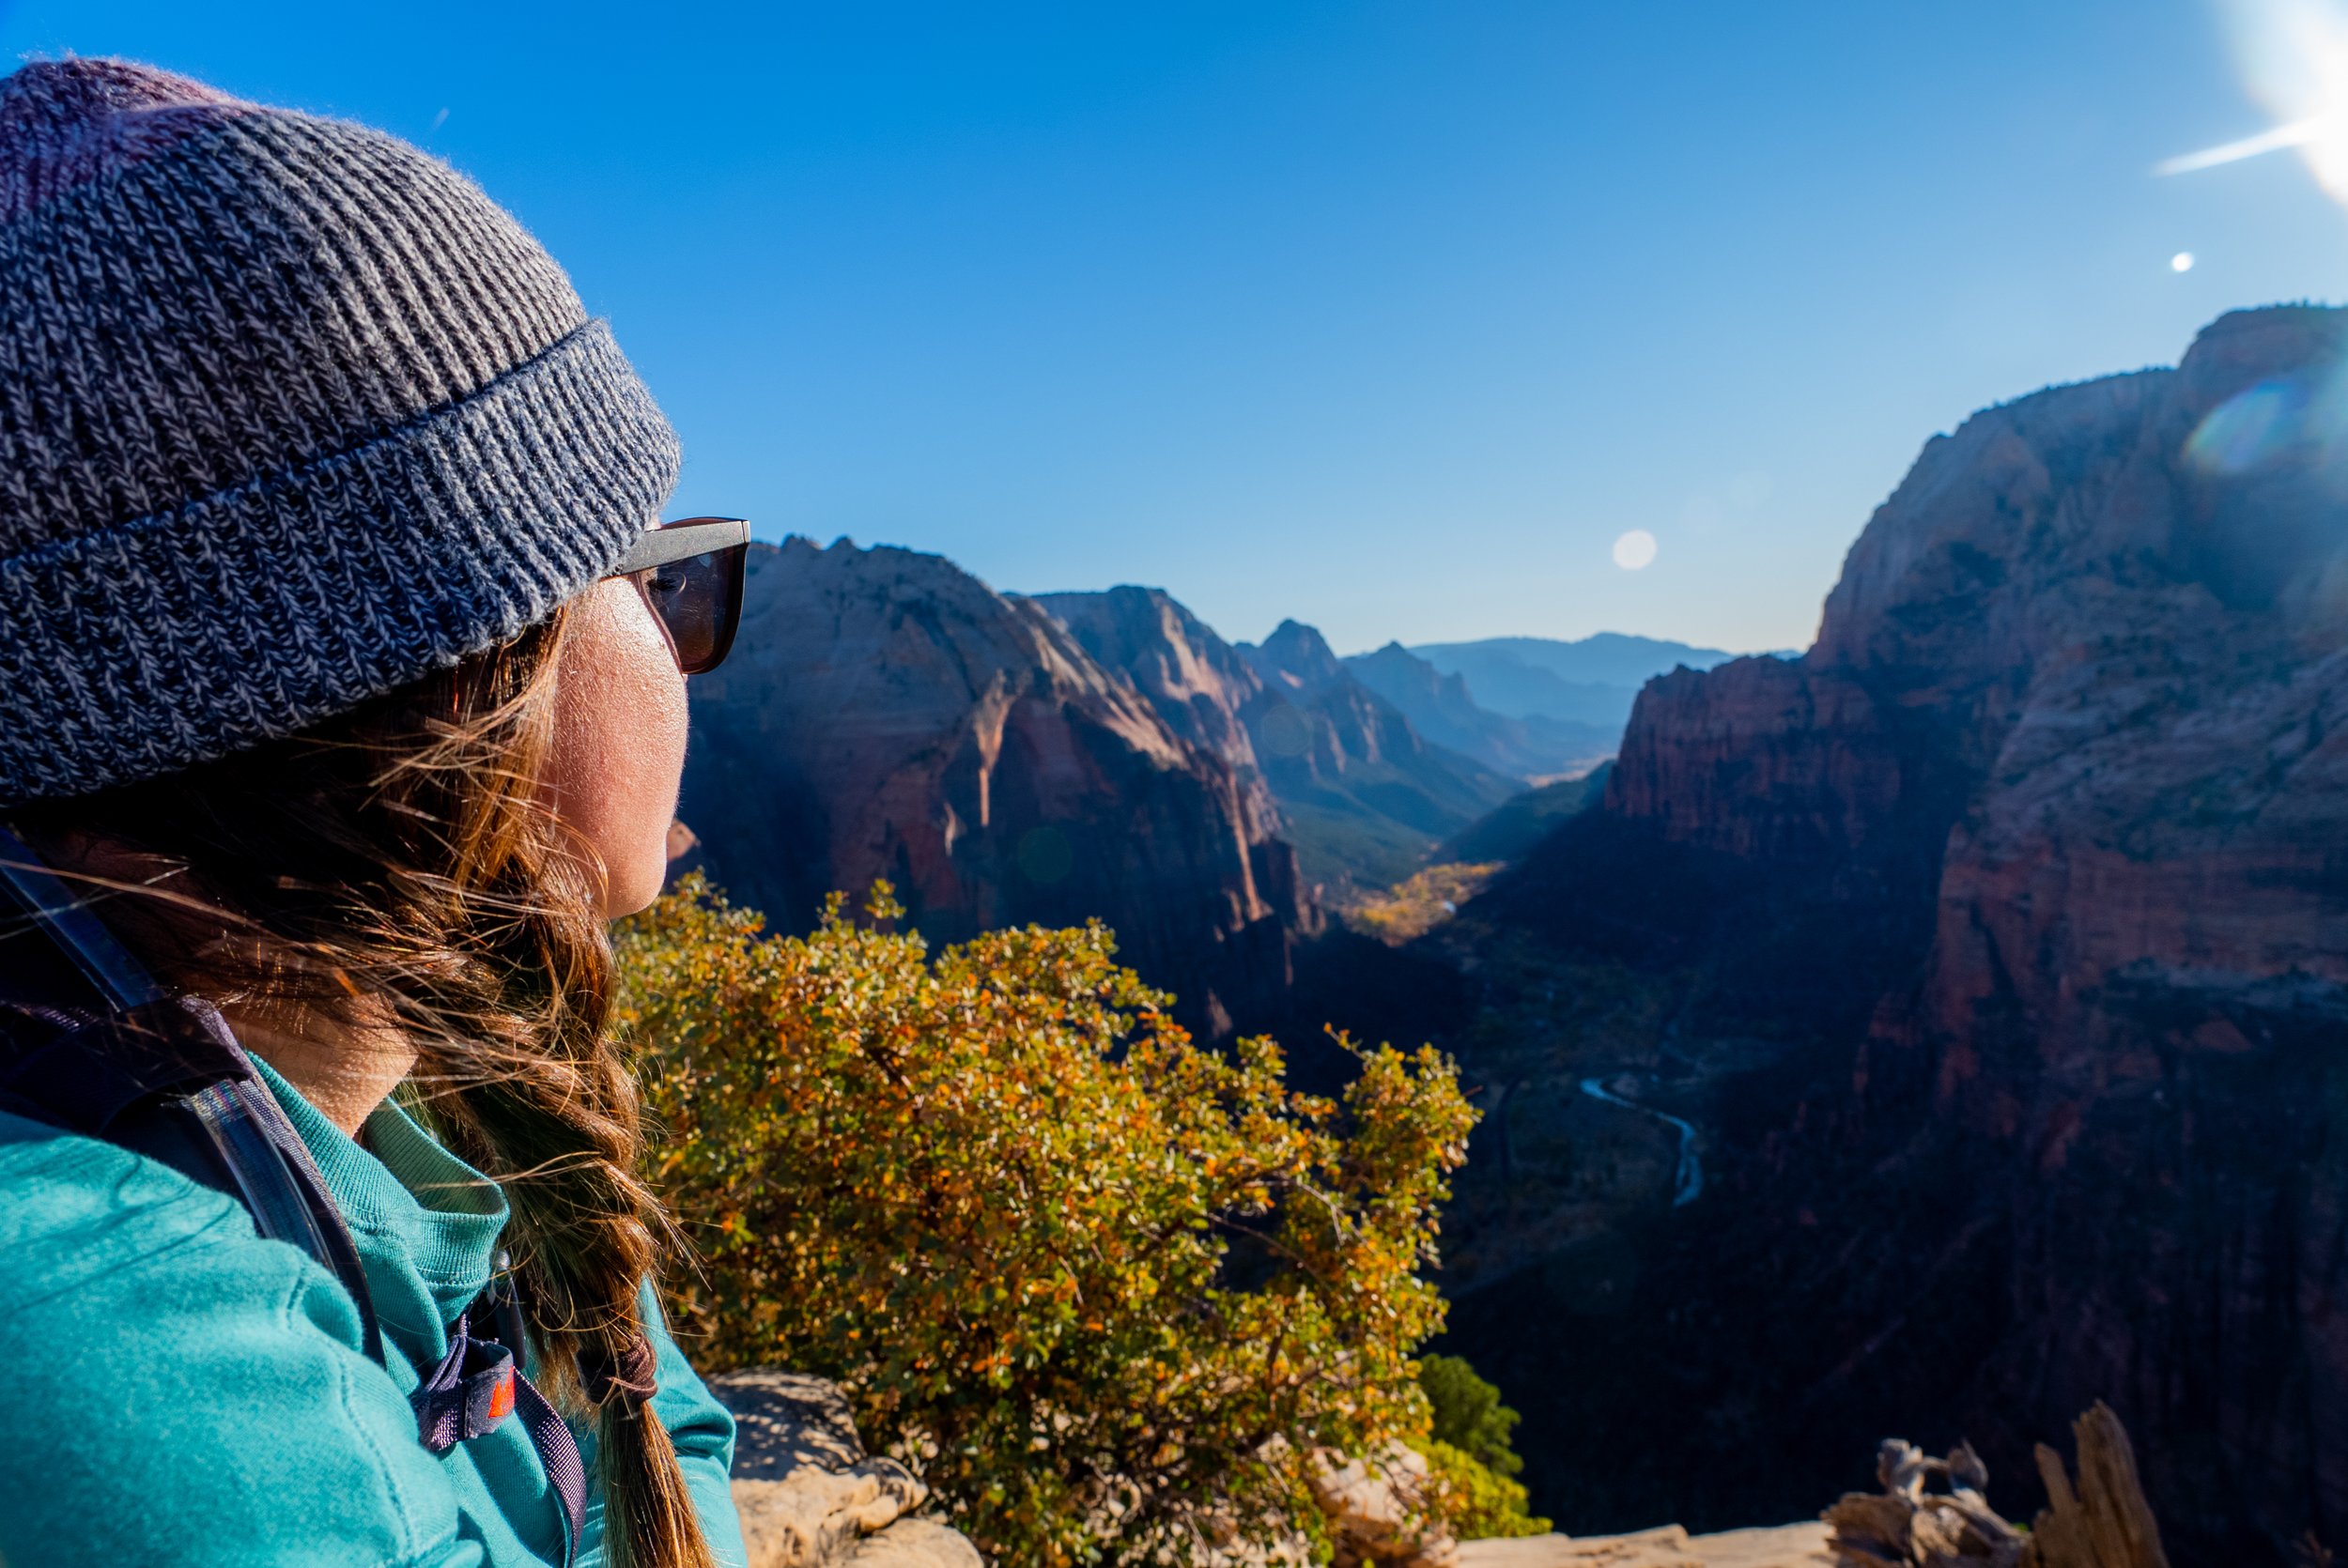
Angel’s Landing is still my favorite hike to this day because it was the first hike (and experience really) that completely pushed me miles from my comfort zone. I had little knowledge of the reputation of Angel’s Landing, and I didn’t know what it looked like. Every mile or so of the hike I would ask, “Are we at Angel’s Landing yet?” I thought we were hiking it the whole time because it was rated strenuous, and in my opinion, the entire hike had been strenuous. When we made it through the first two sections of chains that lead to Scout Lookout, I thought I had made it and was feeling pretty proud of myself. I’ll never forget the feeling I had as we turned a corner, and I actually caught sight of Angel’s Landing for the first time. Realizing I hadn’t even started on the “hard” part, I shot daggers out of my eyes at Ethan and said, “Are you kidding me?” He just grinned. I am typically a self-proclaimed chicken, but I am more stubborn than I am chicken. At that point, I had been pushing myself for hours already. There was no way I would turn around now. Ethan knew that about me, which is probably why he had been so quiet and vague about Angel’s Landing in the first place. I gazed up at the peak, pushed down my fear, and set off for the summit.
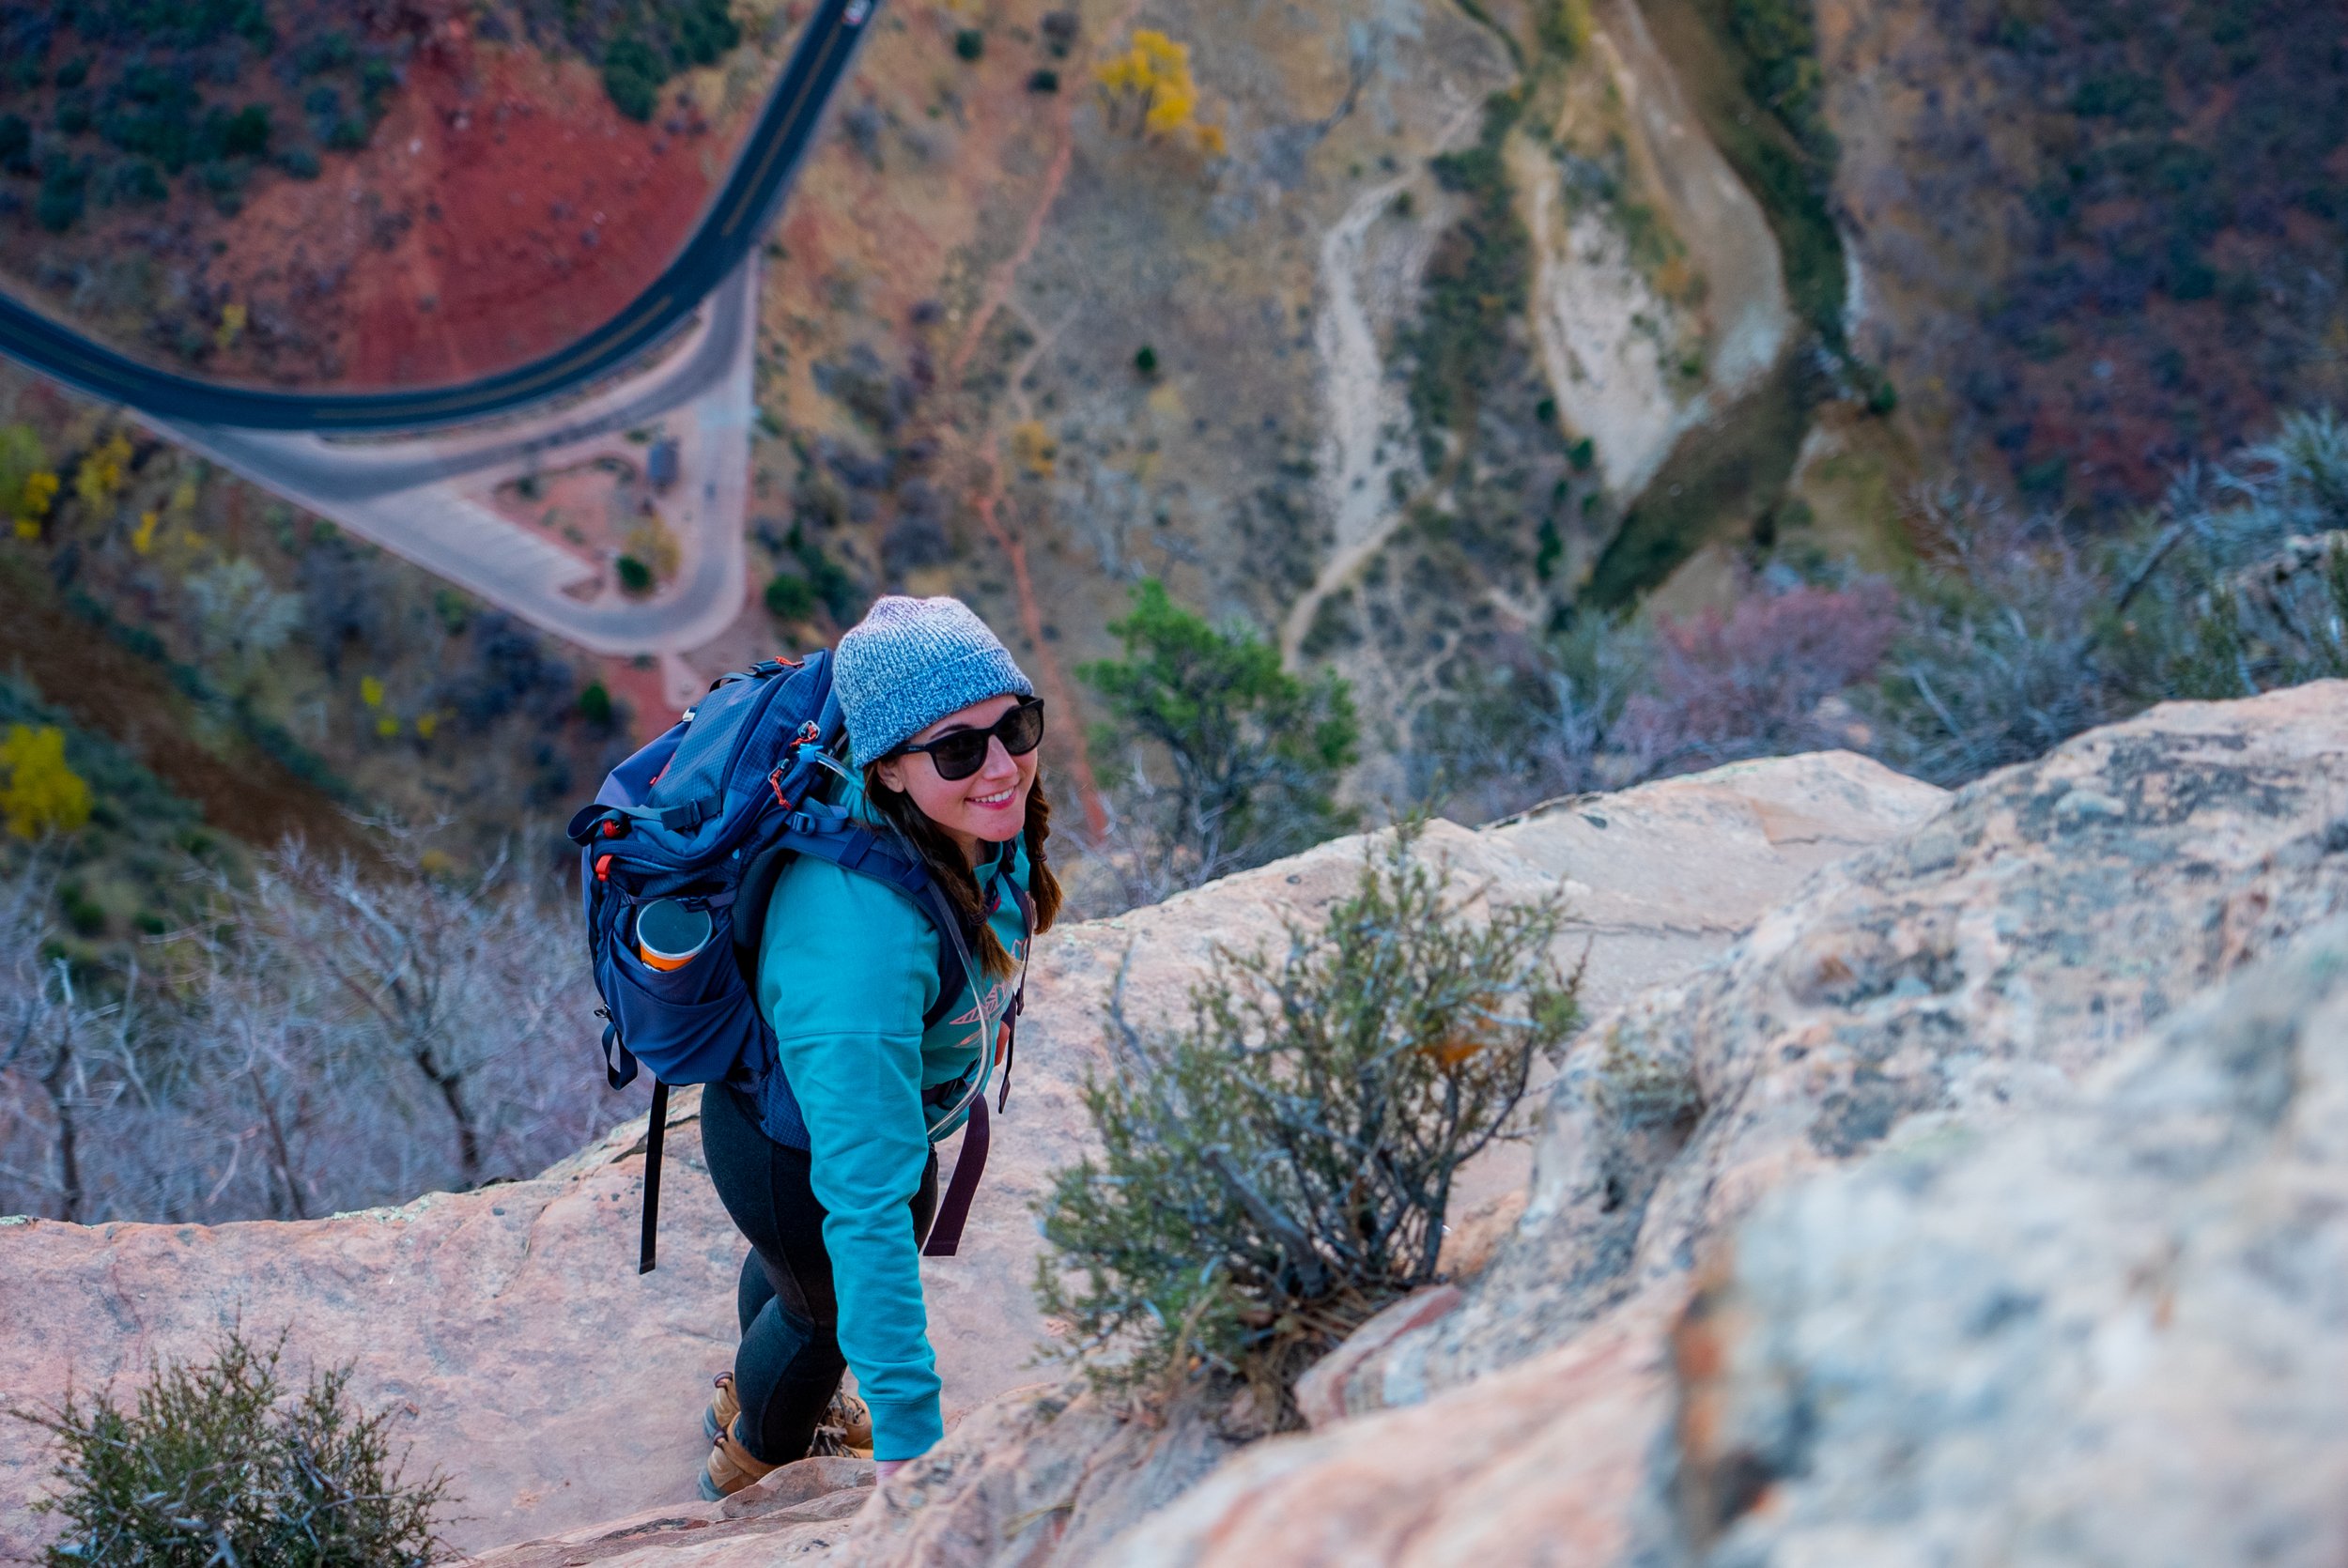
The chains were definitely intimidating. In most places of the trail, you can look down either side and see the nearly straight drop off down below. There were places where I had to step aside and hold onto a stick poking out of the ground to hold my balance while people coming down the trail used the chains. The people were the scariest part of the hike. Knowing that somebody losing their balance or their patience could cause you to tumble down the drop off was not a feeling I enjoyed. When we made it to the top, I forgot about all those anxious feelings and just took in the view and the fact that I freaking did it! I’m glad they have a permit system now to control the traffic a little better though.
We enjoyed our time at the summit and stayed a little longer than we probably should have. When we started heading back down, we were alone. That’s the only reason we have decent pictures of the trail. Otherwise, we were face to butt with people for most of the way up and didn’t have time to stop and take pictures. Most people had already headed back down the trail to beat the sunset. Of course, we didn’t want to get stuck on the chain part of the trail after dark, but we didn’t mind hiking the rest of the way by moonlight if needed. Hiking the last mile of the West Rim Trail back in the dark was worth it for those quiet, people-less moments on Angel’s Landing.
Tips:
Remember to apply for a permit here before planning your trip around this hike. Permits are required to do this hike now.
Drink enough water but not too much water. There aren’t a lot of places to take care of business.
Wait out the crowds if you can.
Be careful.
Be more stubborn than your anxiety.
I recommend riding the shuttle to the Grotto Trailhead if you’re staying outside the park or in the campgrounds.
The trailhead is walking distance from Zion Lodge
Best Hike for a Trail Less Traveled
Sand Bench Trail
Distance: 5.6 mi loop - Time: 2 hours - Elevation Gain: 728 ft - Difficulty: Moderate
Description:
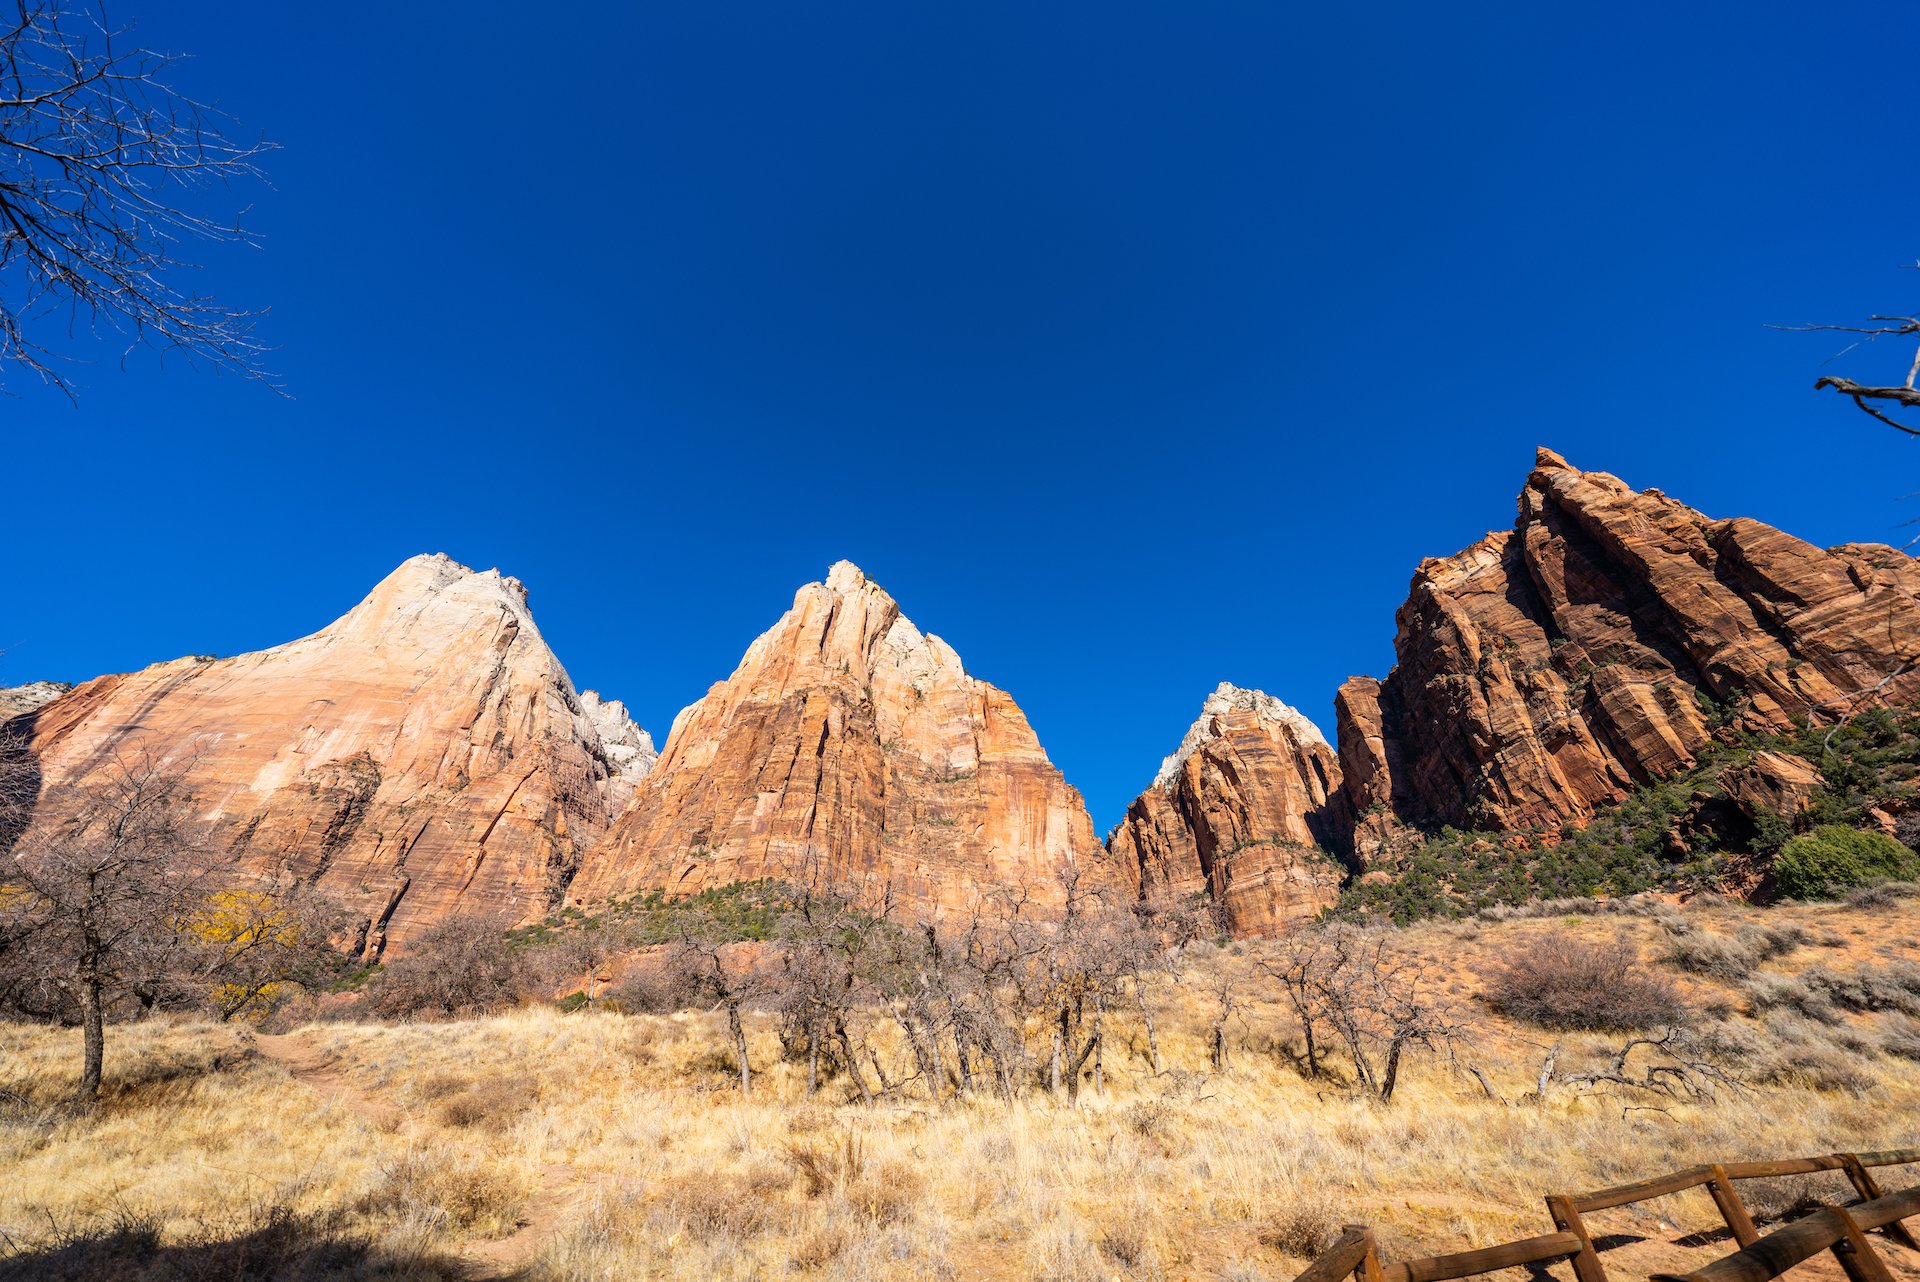
Sand Bench Trail is right across from the Zion Lodge and is appropriately named. It is paved with sand for pretty much the entire trail from what I remember. This trail boasts some pretty great views of the canyon and a popular viewpoint of the Court of the Patriarchs. The trail was very quiet, and we saw maybe three other people the entire hike. It was great for stopping to take photos and appreciate the scenery around us. I rate this hike as moderate due to length and sand, which required a little more effort per step than I anticipated.
Experience:
We knew we wanted to hike the popular trails in Zion like Angel’s Landing and The Narrows, but we didn’t decide to try out Sand Bench Trail until we arrived at the park. The trail was right across from the Zion Lodge where we were staying, so it was an ideal option for a sunrise hike. We were not disappointed. We started off in the dark and immediately saw deer hanging out by the river near the start of the trail. Around the time the sun started to peek over the canyon, we made it to the Court of the Patriarchs. Soon, we came to a fork in the trail that starts the main loop. We went right at the fork, but I would recommend choosing left. The views are beautiful whichever path you choose, but the sand covering the right path made the elevation gain feel like 1,400 ft instead of 700 ft. If you go left, the elevation gain is mostly on a rocky area instead of sand, and rocks tend to be a bit more supportive than sand. Live and learn! Eventually, we came to a ledge that made the perfect stop for a scenic mid-hike breakfast. Afterwards, we continued on and crossed a peaceful ravine as we made our way back to the start of the loop.
Tips:
Go left (clockwise) on the loop.
Try it out at sunrise.
Wear sand appropriate shoes.
I recommend riding the shuttle to the trailhead if you are staying outside the park or in the campgrounds.
The trail is walking distance from Zion Lodge.
Best Hike for an Unforgettable Experience
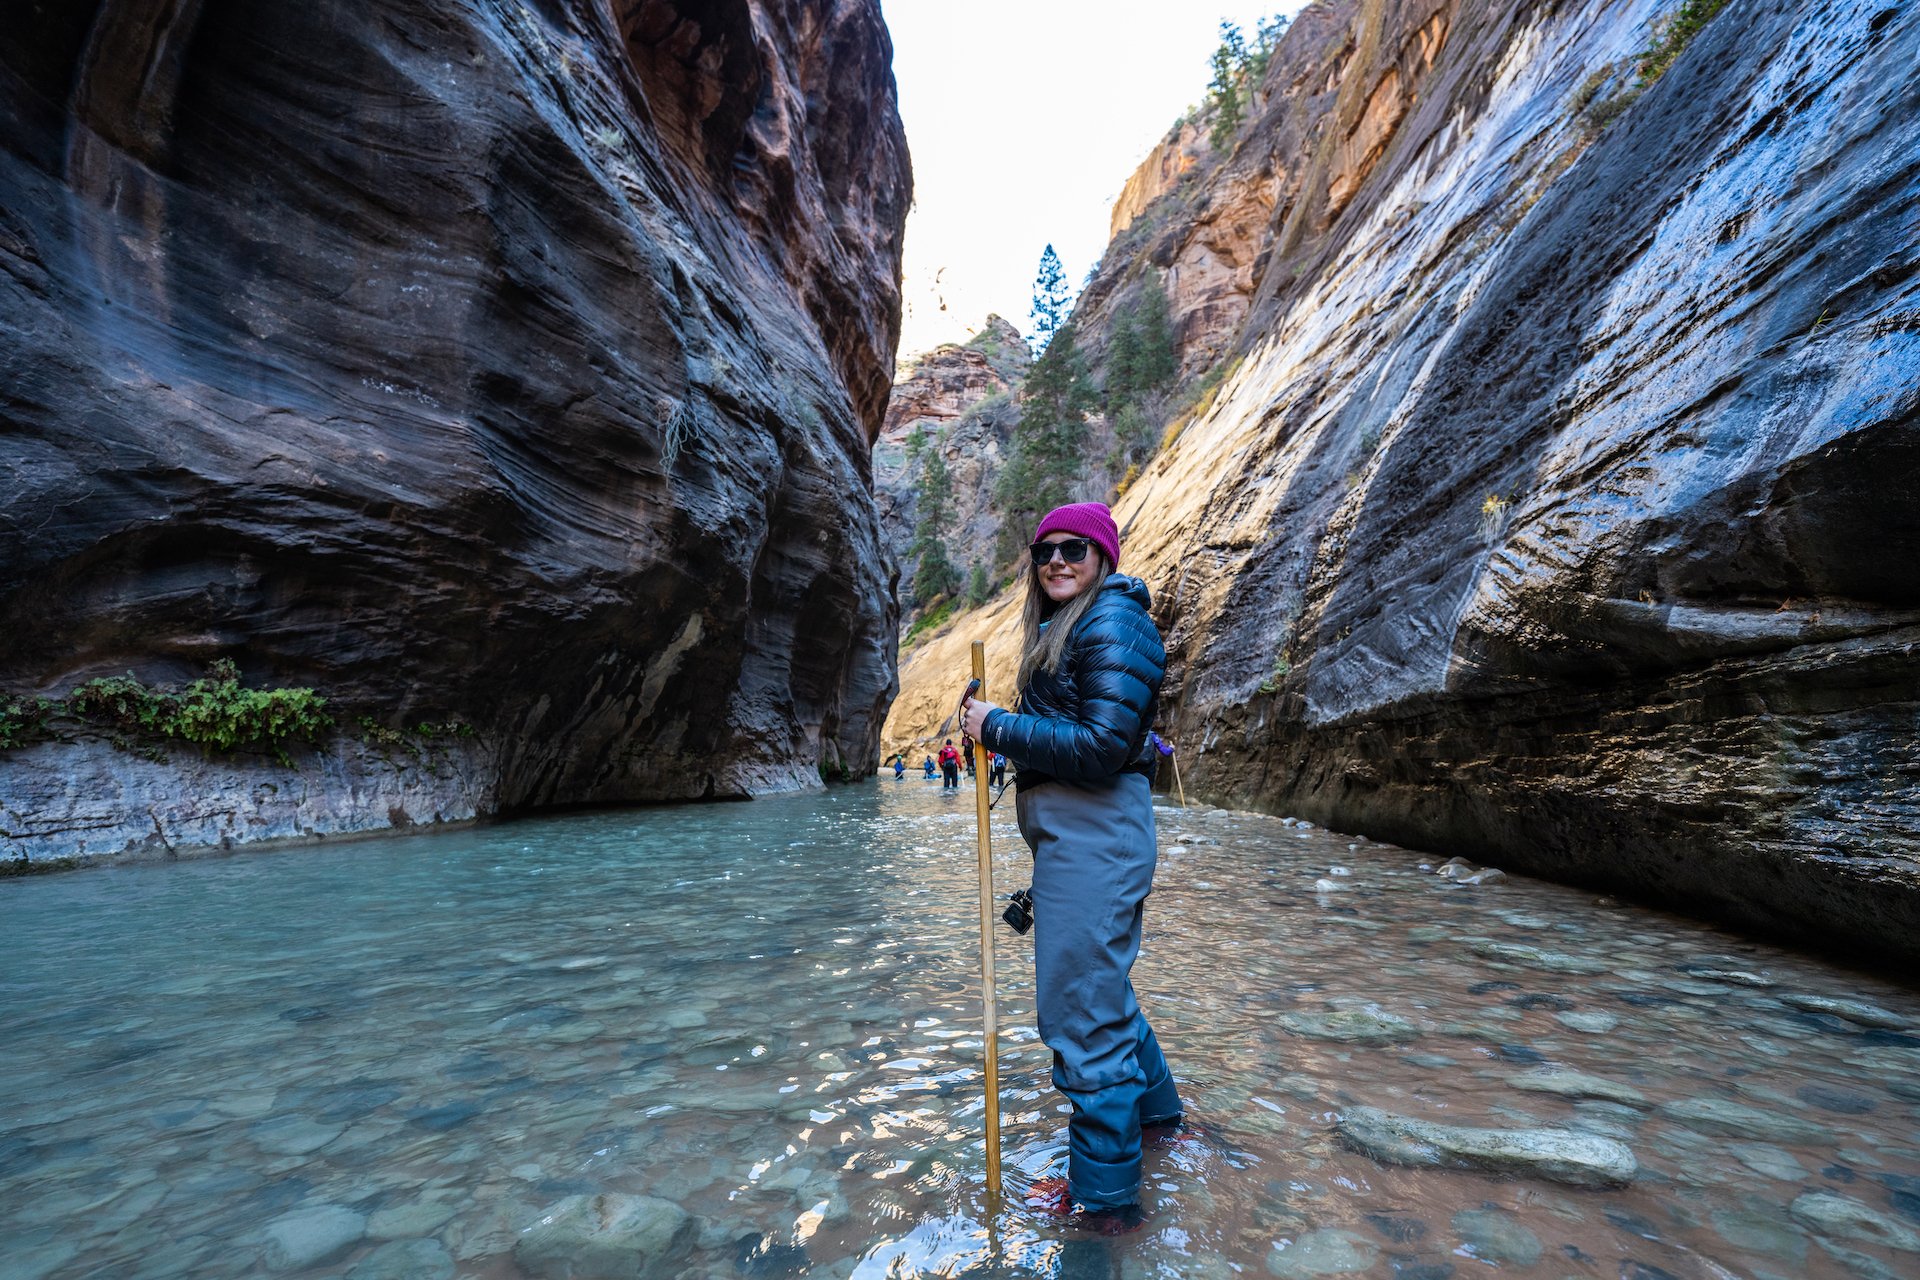
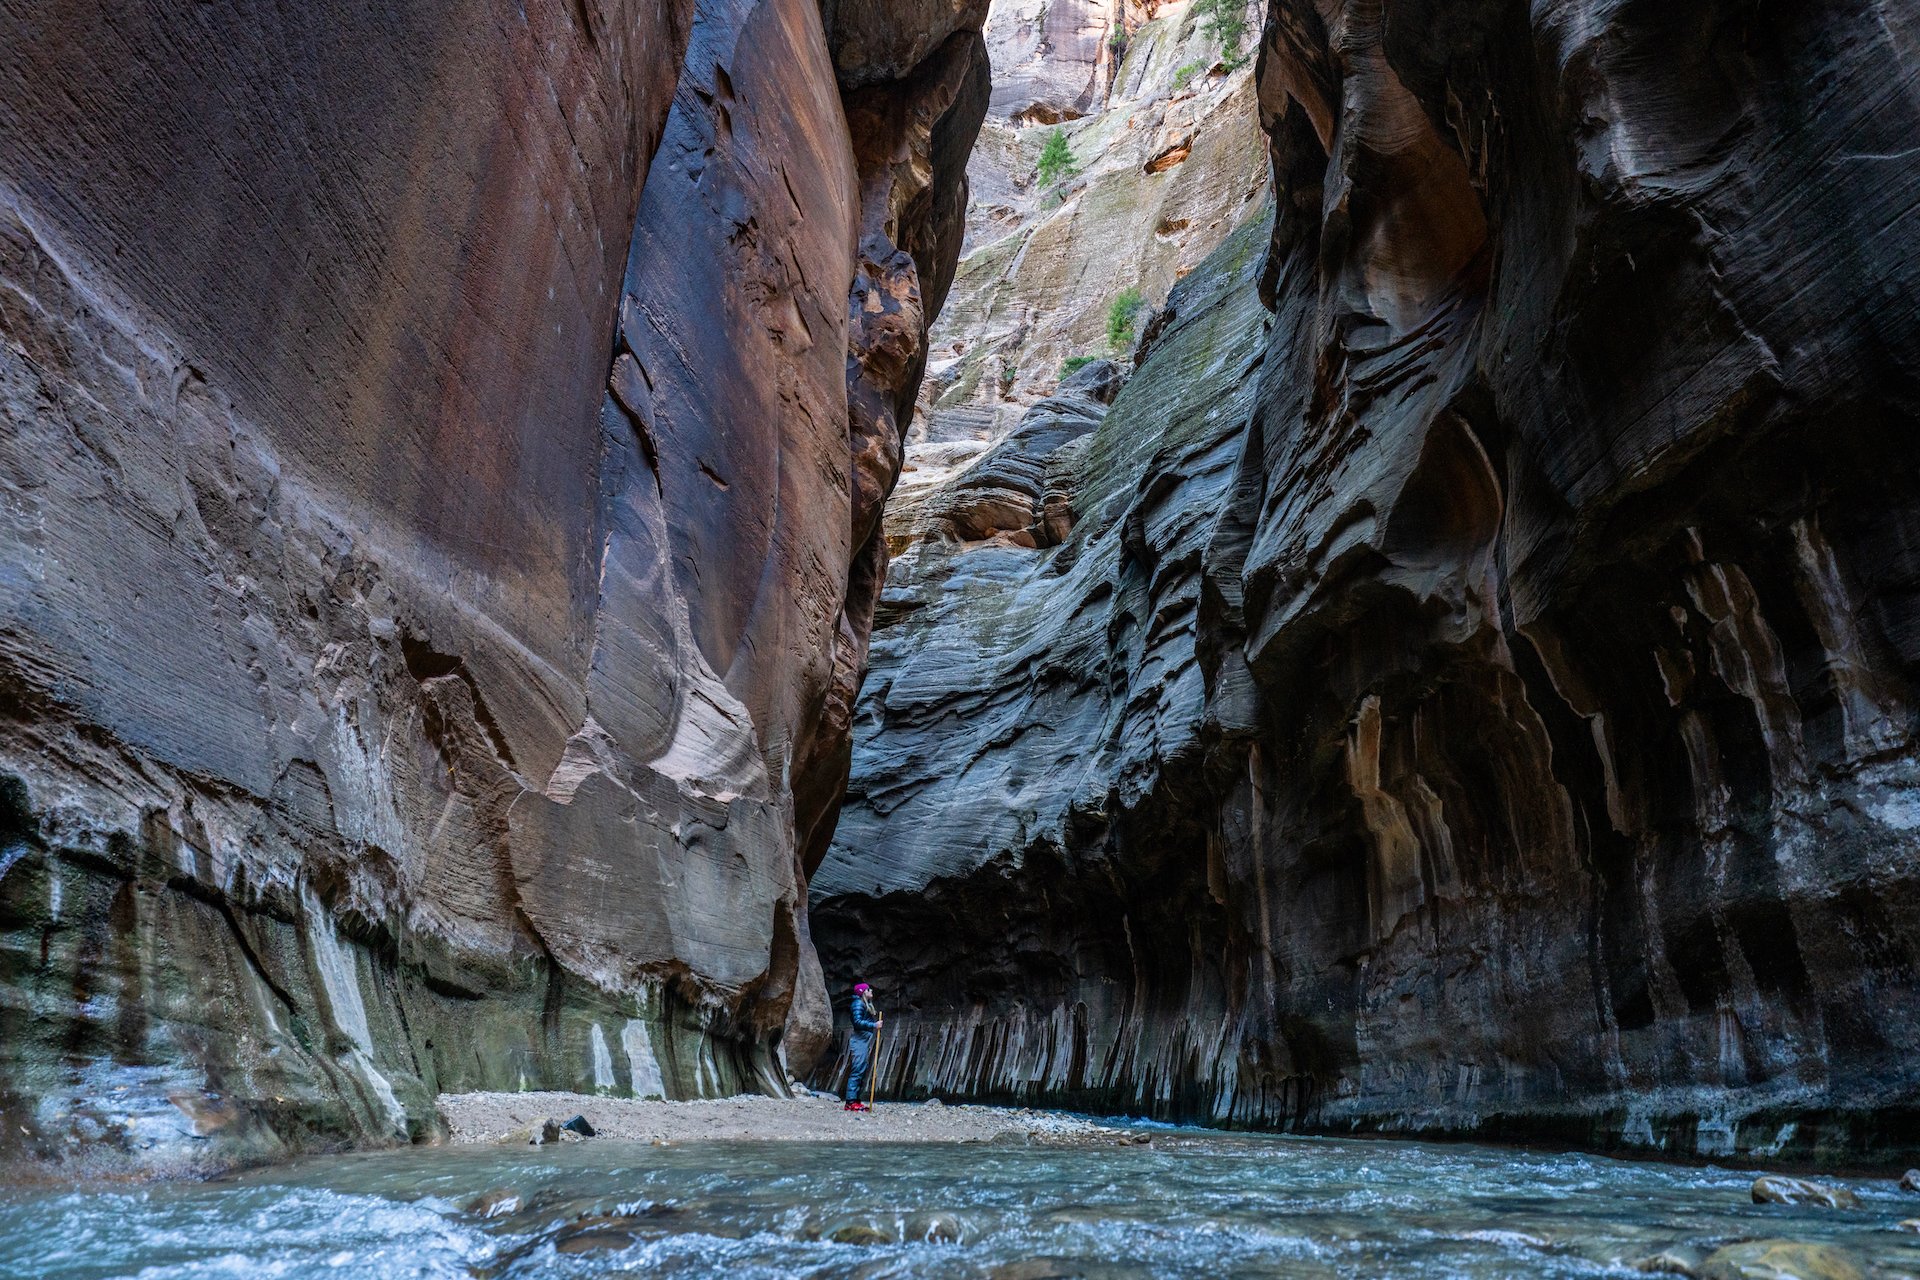
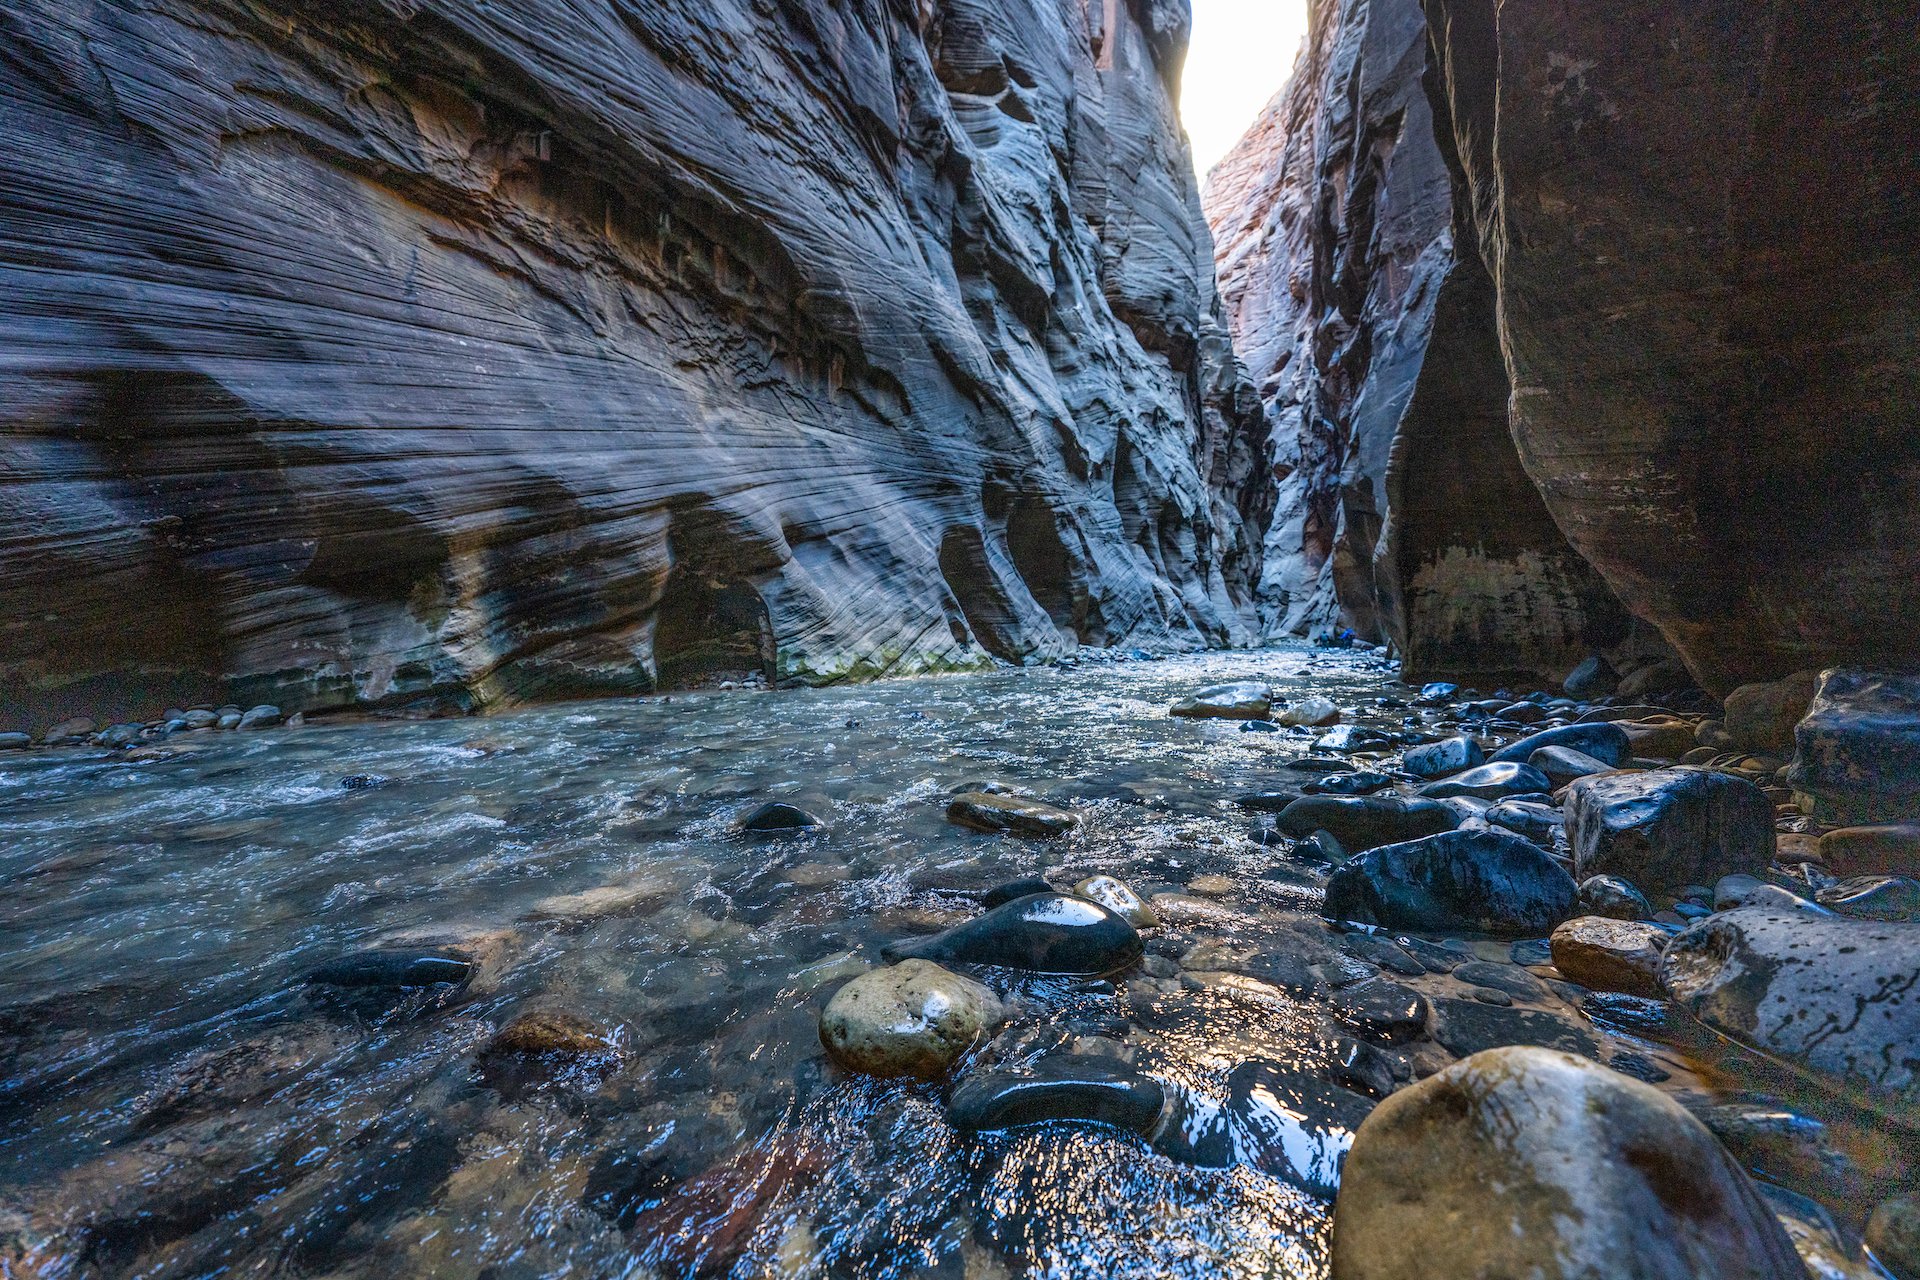
The Narrows
Distance: 8.9 mi - Time: 3.5 hours - Elevation Gain: 695 ft - Difficulty: Hard
Description:
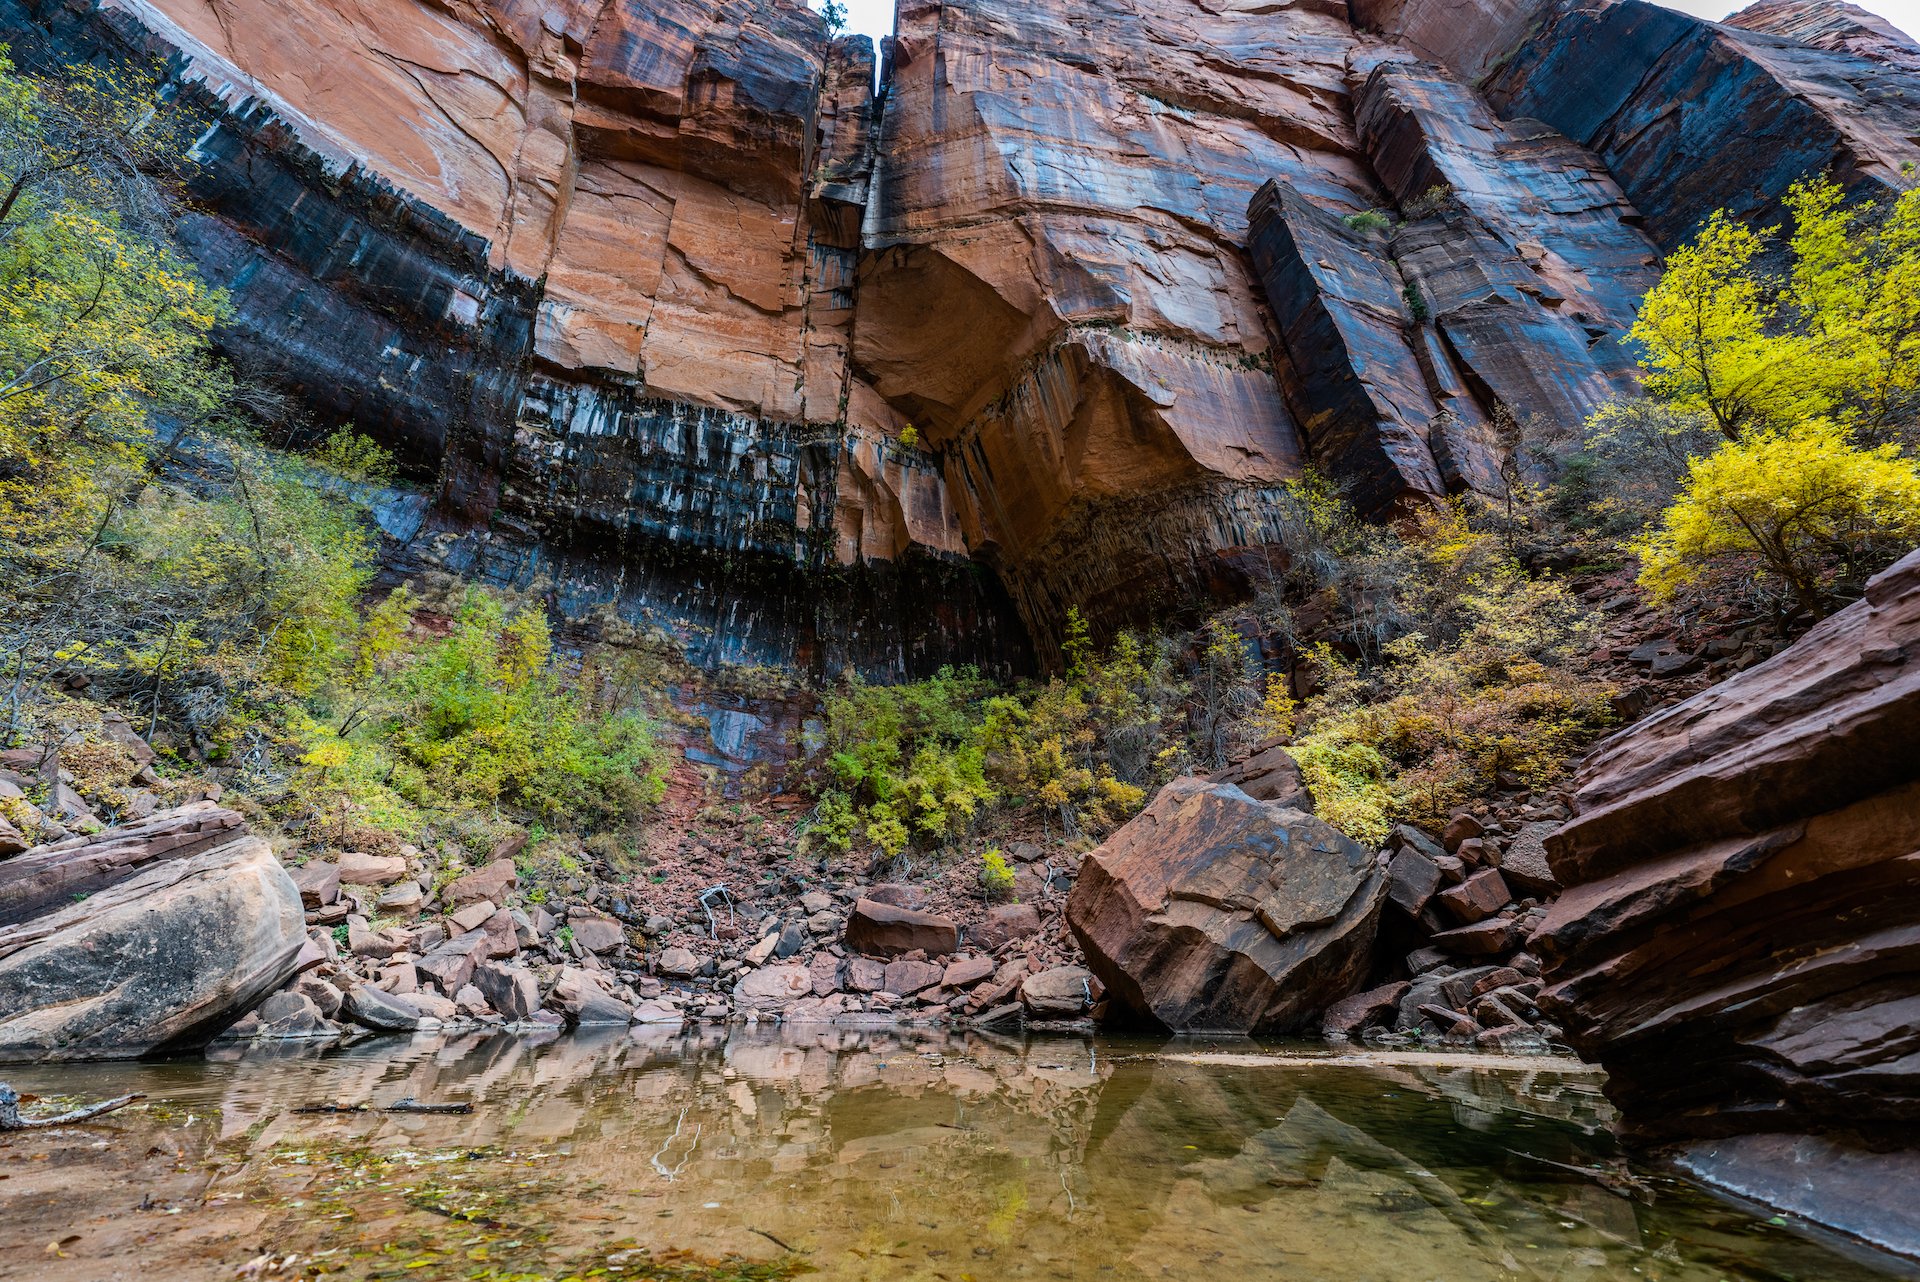
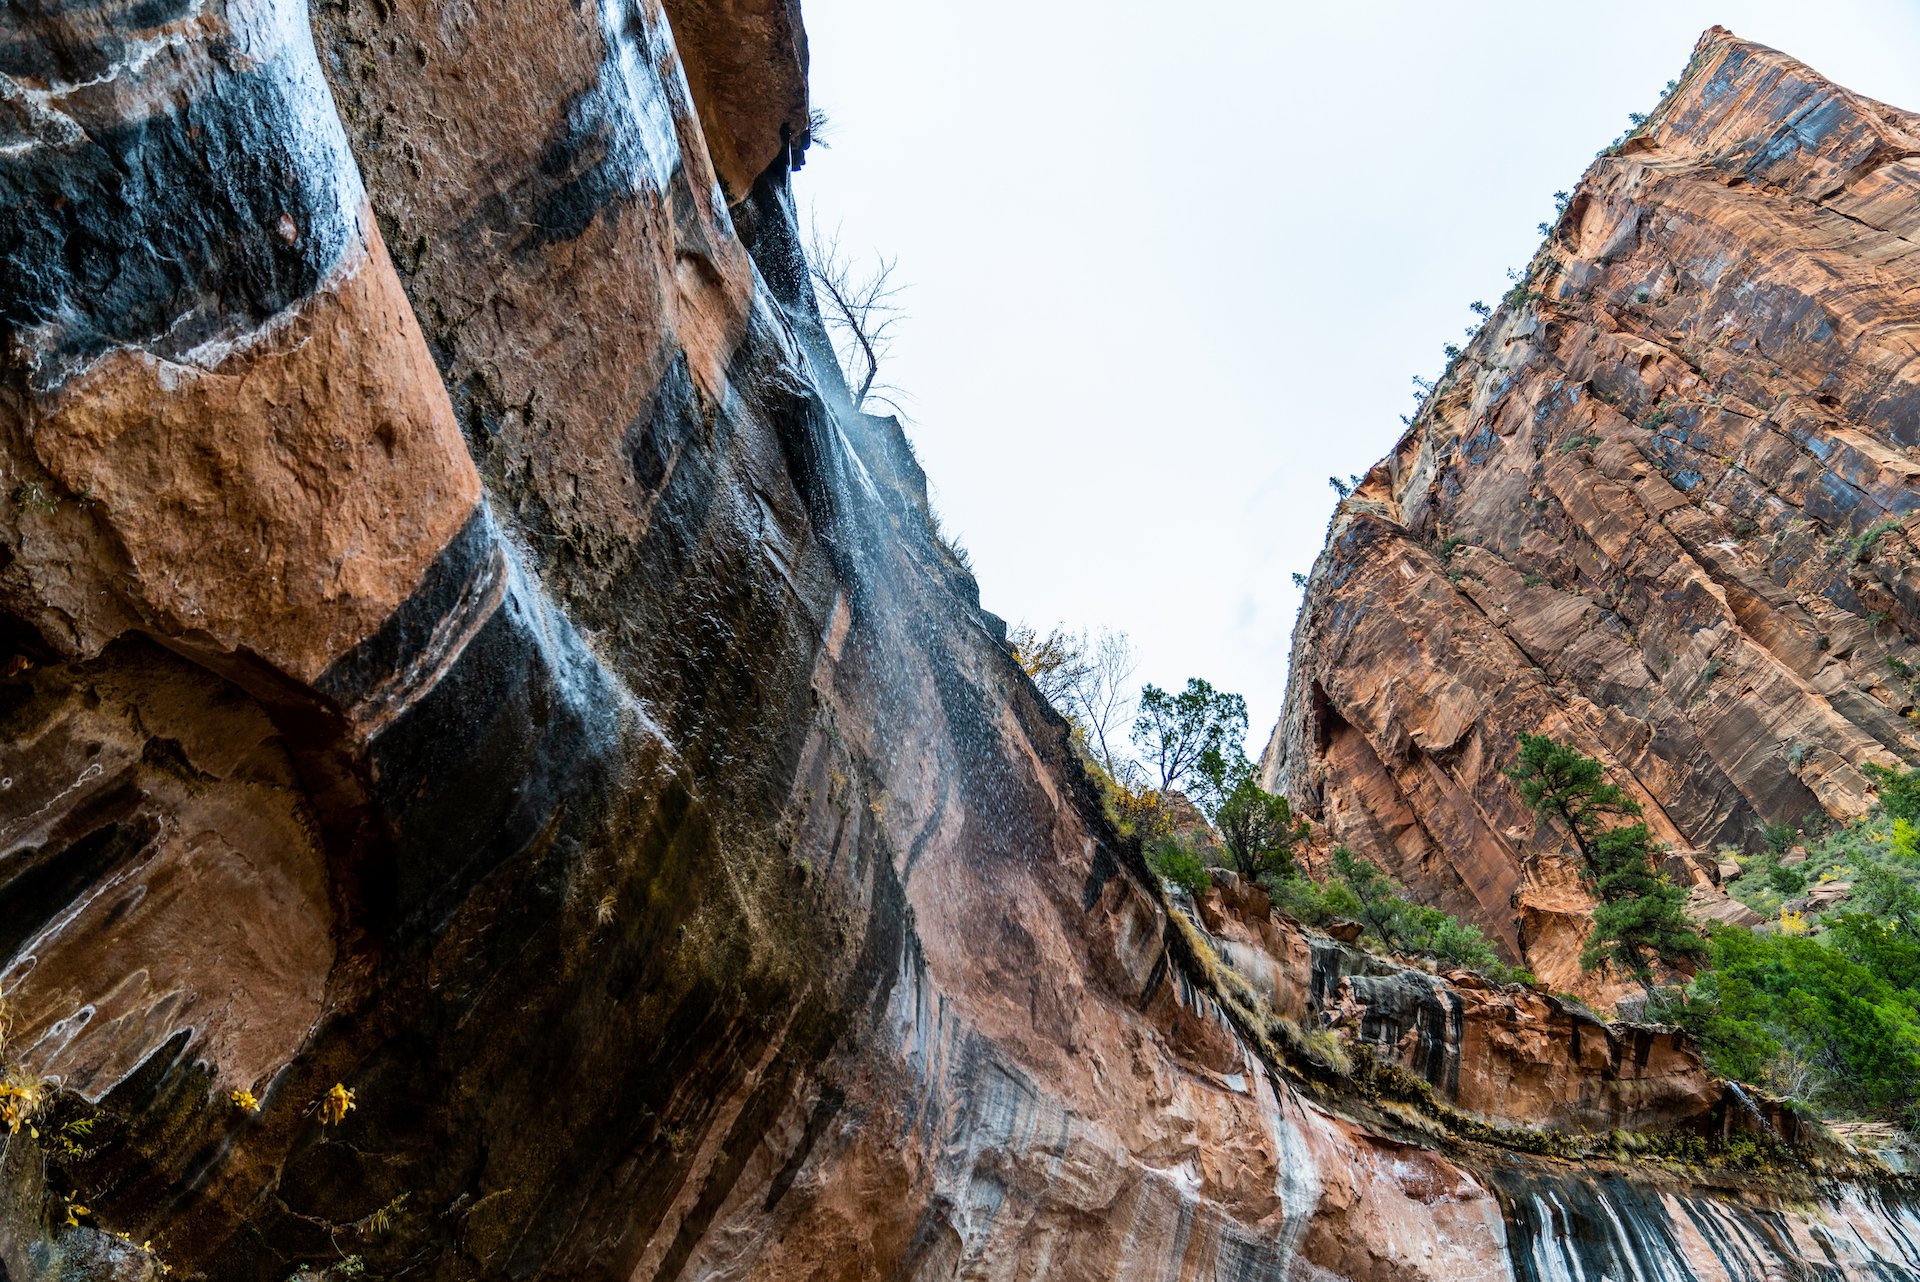
The Narrows is one of Zion’s iconic trails, so it’s not necessarily a unique hike for a Zion experience. However, the trail system runs through a slot canyon which makes it a hiking experience like no other! We hiked The Narrows from the Bottom Up towards Big Springs. It’s important to know that there is about a 2 mile hike along the Zion Narrows Riverside Walk before you get to the entrance of The Narrows. We did not hike all the way to the end of The Narrows, and you need a permit to go beyond through the Virgin River Narrows. I rate this hike as hard because of length and the constant micro-adjustments you make during the hike to keep from falling on the slippery rocks.
Experience:
Ethan visited Zion four years before we finally went together. When he came home from his trip, he said that he made it to the entrance of The Narrows and decided to turn around because he wanted to experience it with me someday. So needless to say, this hike was already romanticized for me. Even without that background though, this hike is truly unforgettable.
As soon as you get to the entrance, you’re greeted with towering canyon walls and clear running water. Right away, it’s obvious that you are in a place like no other. We made it about 20 feet before being waist deep in water. I’m short (5’3”) so the water wound up going over my waders, and I was already cold and wet within the first 5 minutes of our hike. I wasn’t really upset about this. I mean, what do you expect when hiking through a river? There’s definitely a possibility that you might get wet. I was disappointed and anxious that I might get too uncomfortable to go as far as I wanted though. My legs almost didn’t feel like my own during the hike. They were sore from hiking 12 miles the day before and numb from the cold water. They were unreliable, and I slipped about 100 plus times during our hike and actually fell down into the water twice. Despite all that though, I LOVED hiking The Narrows. It’s a popular hike, so it wasn’t always peaceful. But the further we went, eventually, it started to feel like it was just us, the water, and the canyon. We stopped to listen to the echoes of the water running through the canyon, and imagined how the beautiful landmark was shaped. It was hard not to feel grateful and in awe of nature while hiking The Narrows.
Tips:
Visiting in warm weather means you can enjoy this hike in a swimsuit.
Visiting in cool weather means the water is very cold, and you should wear gear to keep you warm. We rented our gear from Zion Outfitter.
Remember to get a permit if you want to hike past Big Springs through the Virgin River Narrows.
Pay attention to weather. The Narrows can flash flood in an instant.
The further you go, the deeper the water. Be prepared.
I recommend riding a shuttle to the trailhead. It is not walking distance from any campgrounds or lodging in the park.
Best Hike for Big Rewards with Little Effort
Emerald Pools Trail (Lower, Middle, Upper)
Distance: 3 mi loop - Time: 1.5 hours - Elevation Gain: 620 ft - Difficulty: Lower: Easy, Middle & Upper: Moderate
Description:
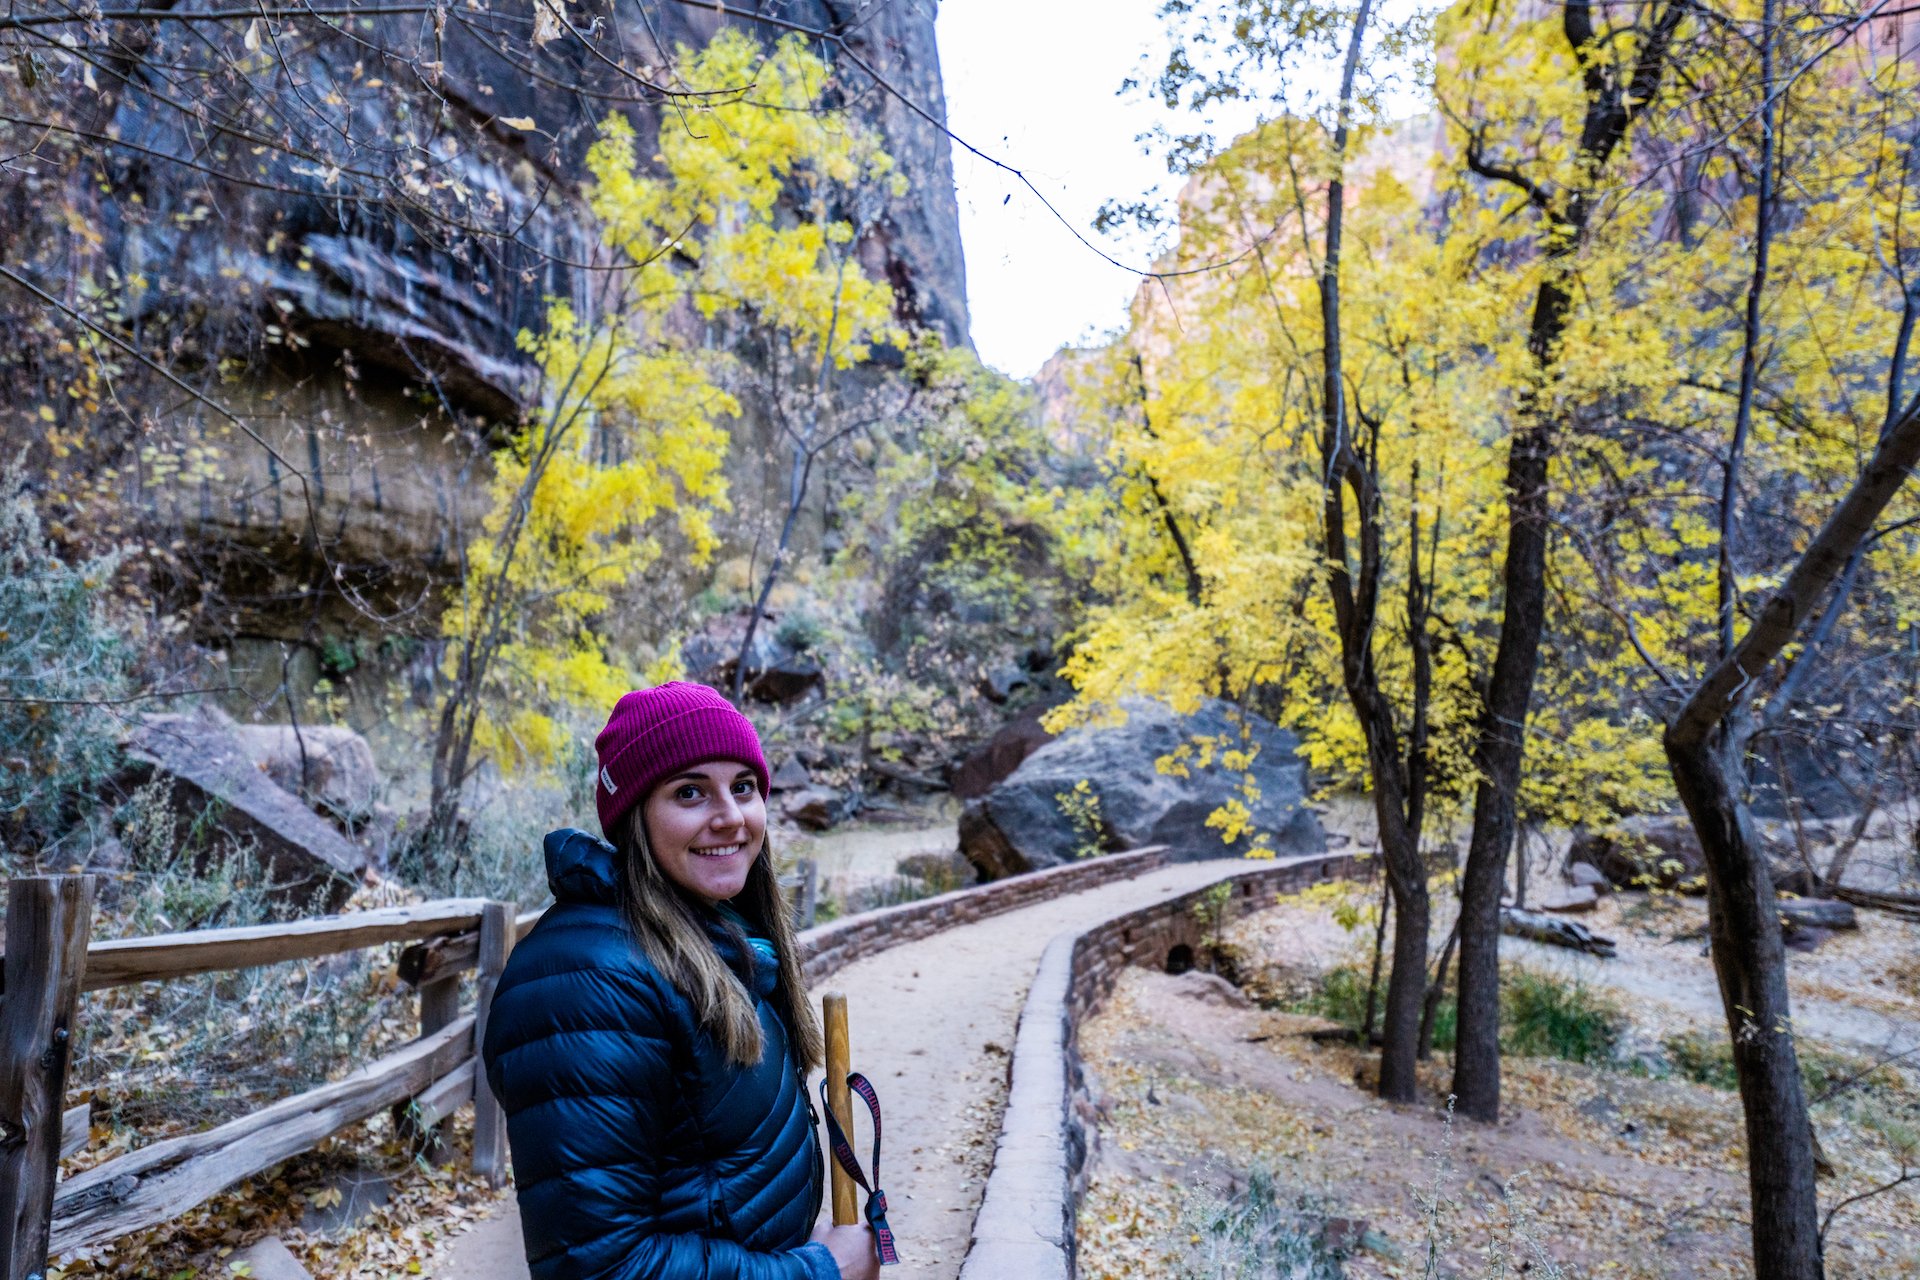
Emerald Pools Trail was the very first trail we hiked at Zion when we arrived. It consists of Upper, Middle, and Lower Emerald Pools. Each section has pools and waterfalls to gaze at, so you get great views no matter your hiking ability. I rated these separately because they vary. I rate Lower Emerald Pools as easy because there is almost no elevation gain. I rate Middle and Upper Pools as moderate due to some elevation gain and short bursts of scrambling on parts the trail. For me, scrambling means that I feel the need to use my hands to help keep balance and/or assist in crawling up some parts of a trail.
Experience:
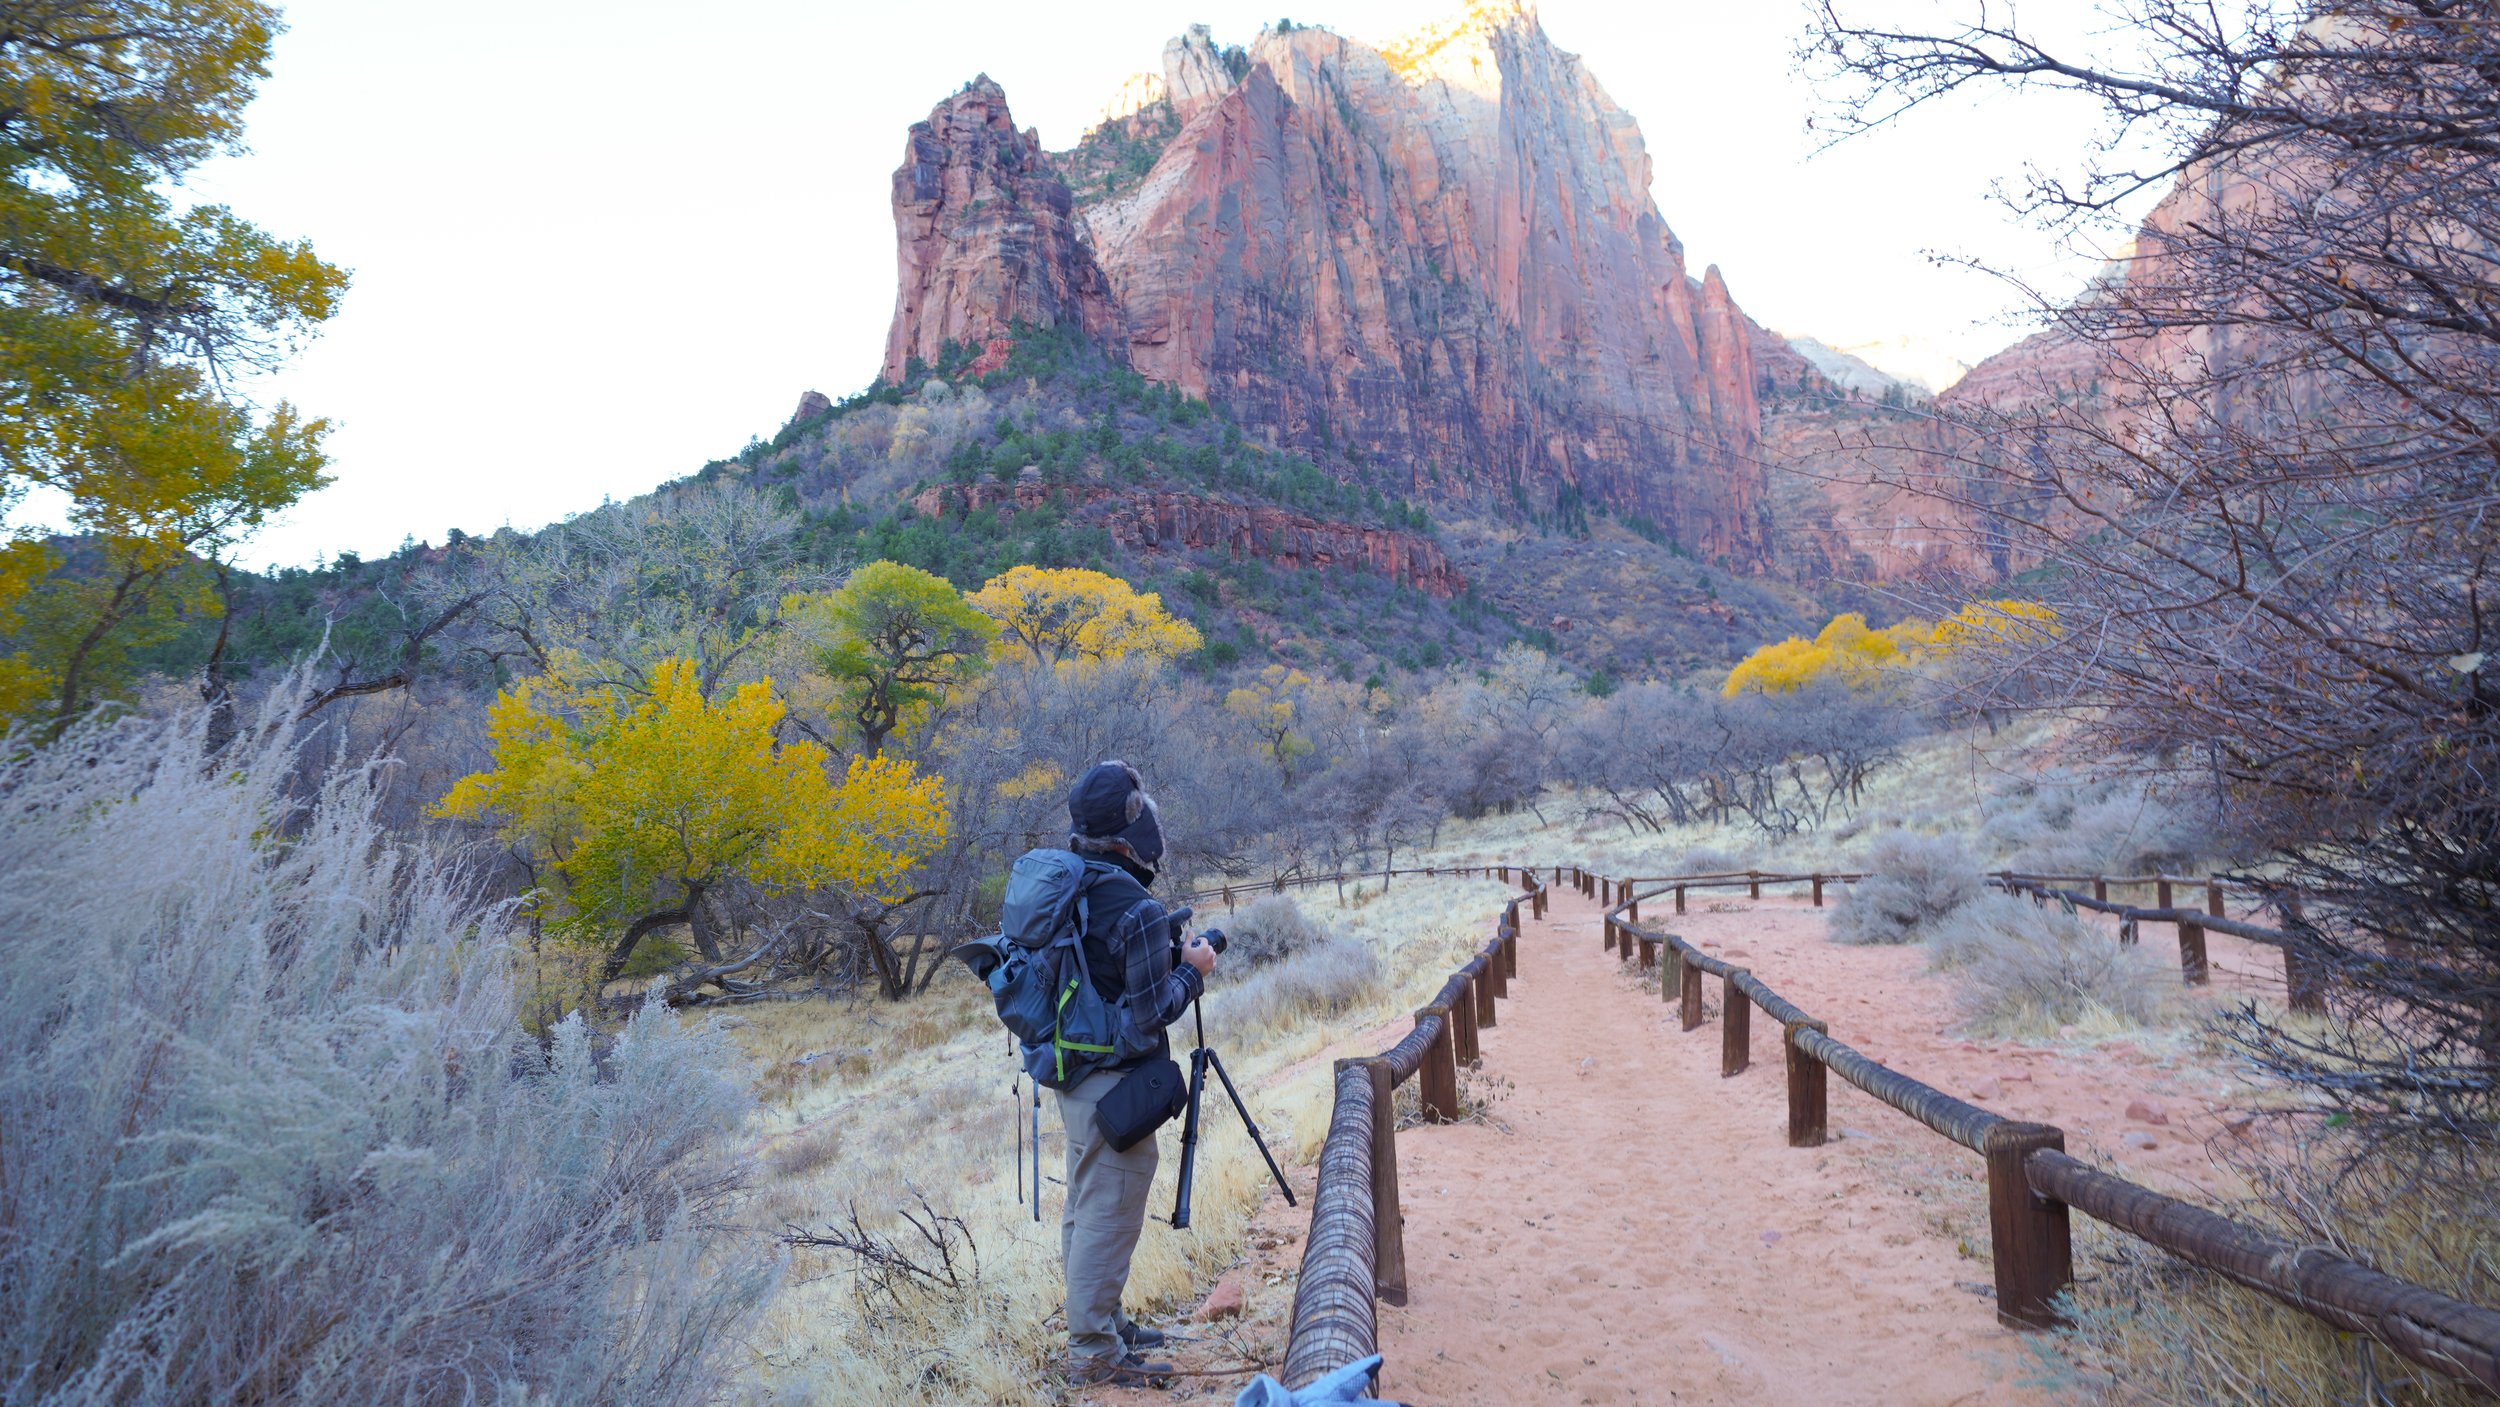
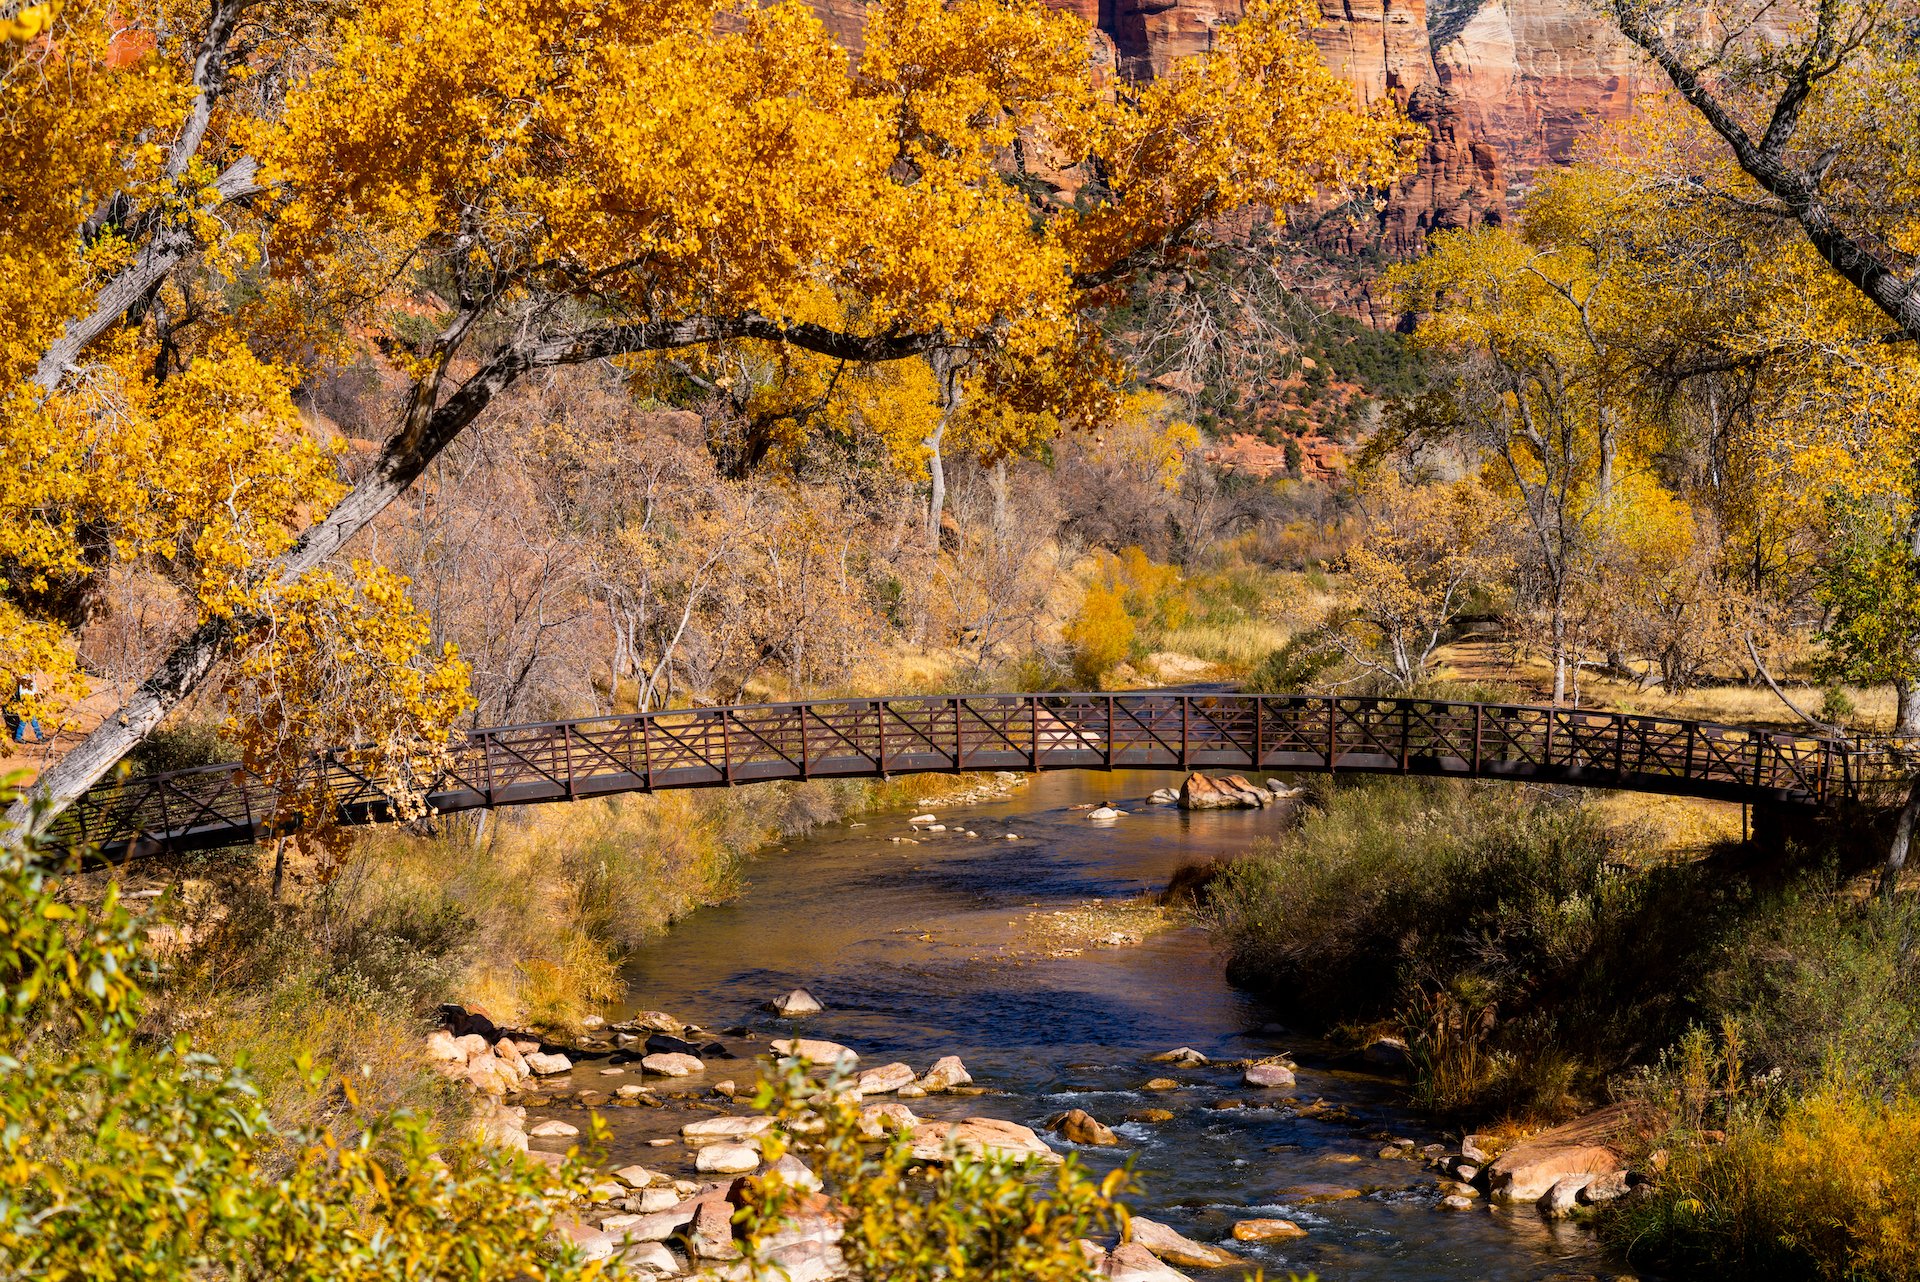
When we first arrived to Zion, we were eager to get started exploring the park. We were staying at the Zion Lodge and couldn’t check in yet when we arrived, so we decided to head across the street to the Emerald Pools Trail. Right away, I was impressed by the beautiful Fall colors as we crossed the river to get to the trail. We are originally from West Texas, so I had never seen Fall colors like that before! When we made it to the trail, we were greeted by water falls almost right away. It didn’t take much effort to get to the first pool view and take in the waterfall sprinkling into the otherwise calm water of the pool. I loved this hike not only because it was the first hike of the trip but because of the simplicity of it. It was absolutely stunning, yet we didn’t have to work very hard to see some of the most beautiful parts of the park. It was a great first hike, and one that pretty much anyone can enjoy.
Tips:
Bring a rain jacket. There are parts of the trail where you walk under the falls.
Watch your step on the Middle and Upper Trails. There are some areas the ground gets slippery and dirt gets loose.
Watch for deer along the river. We saw quite a few!
I recommend riding the shuttle to the trailhead if you are staying outside the park or in the campgrounds.
The Zion Lodge is walking distance from the trail.
Best Hike for an Incredible View
Observation Point via East Mesa Trail
Distance: 7 mi out and back - Time: 3 hours - Elevation Gain: 702 ft - Difficulty: Moderate
Description:
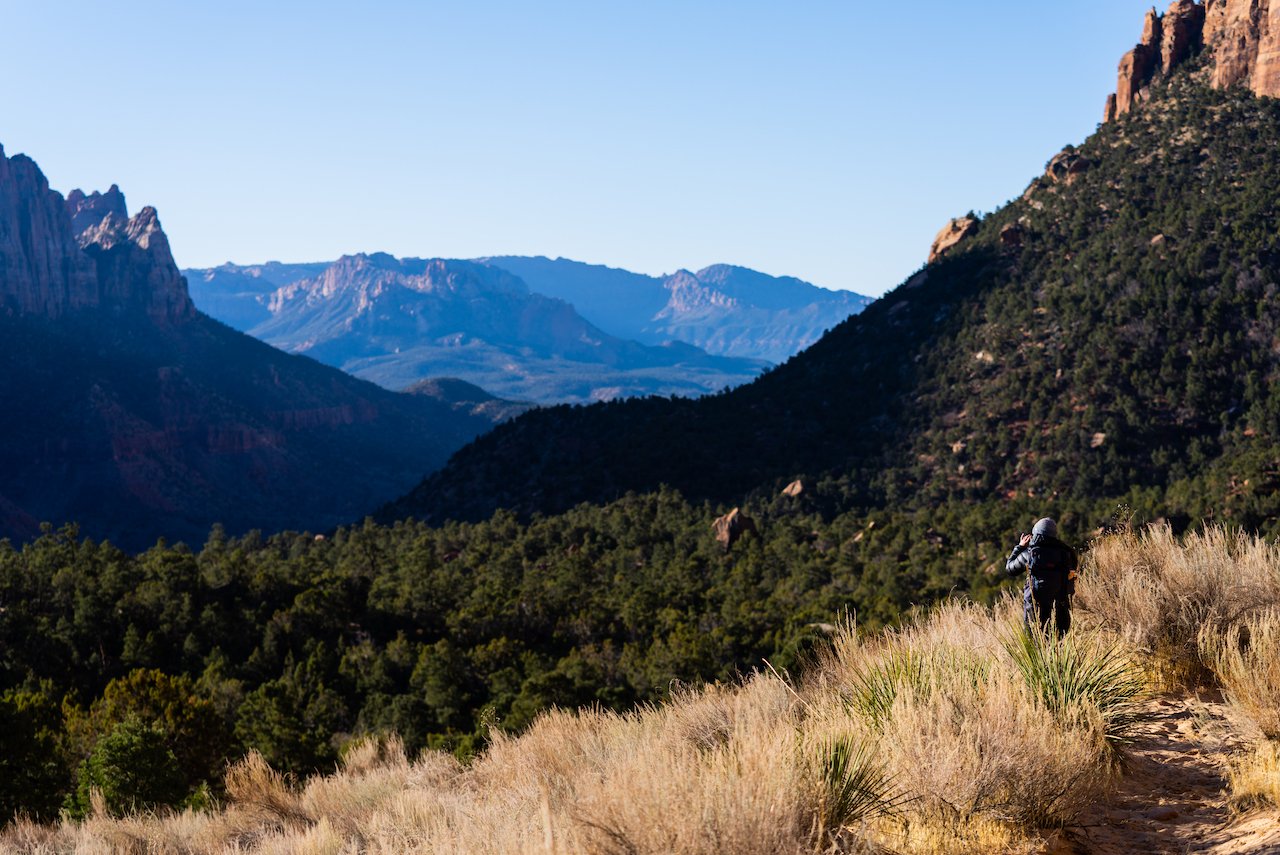
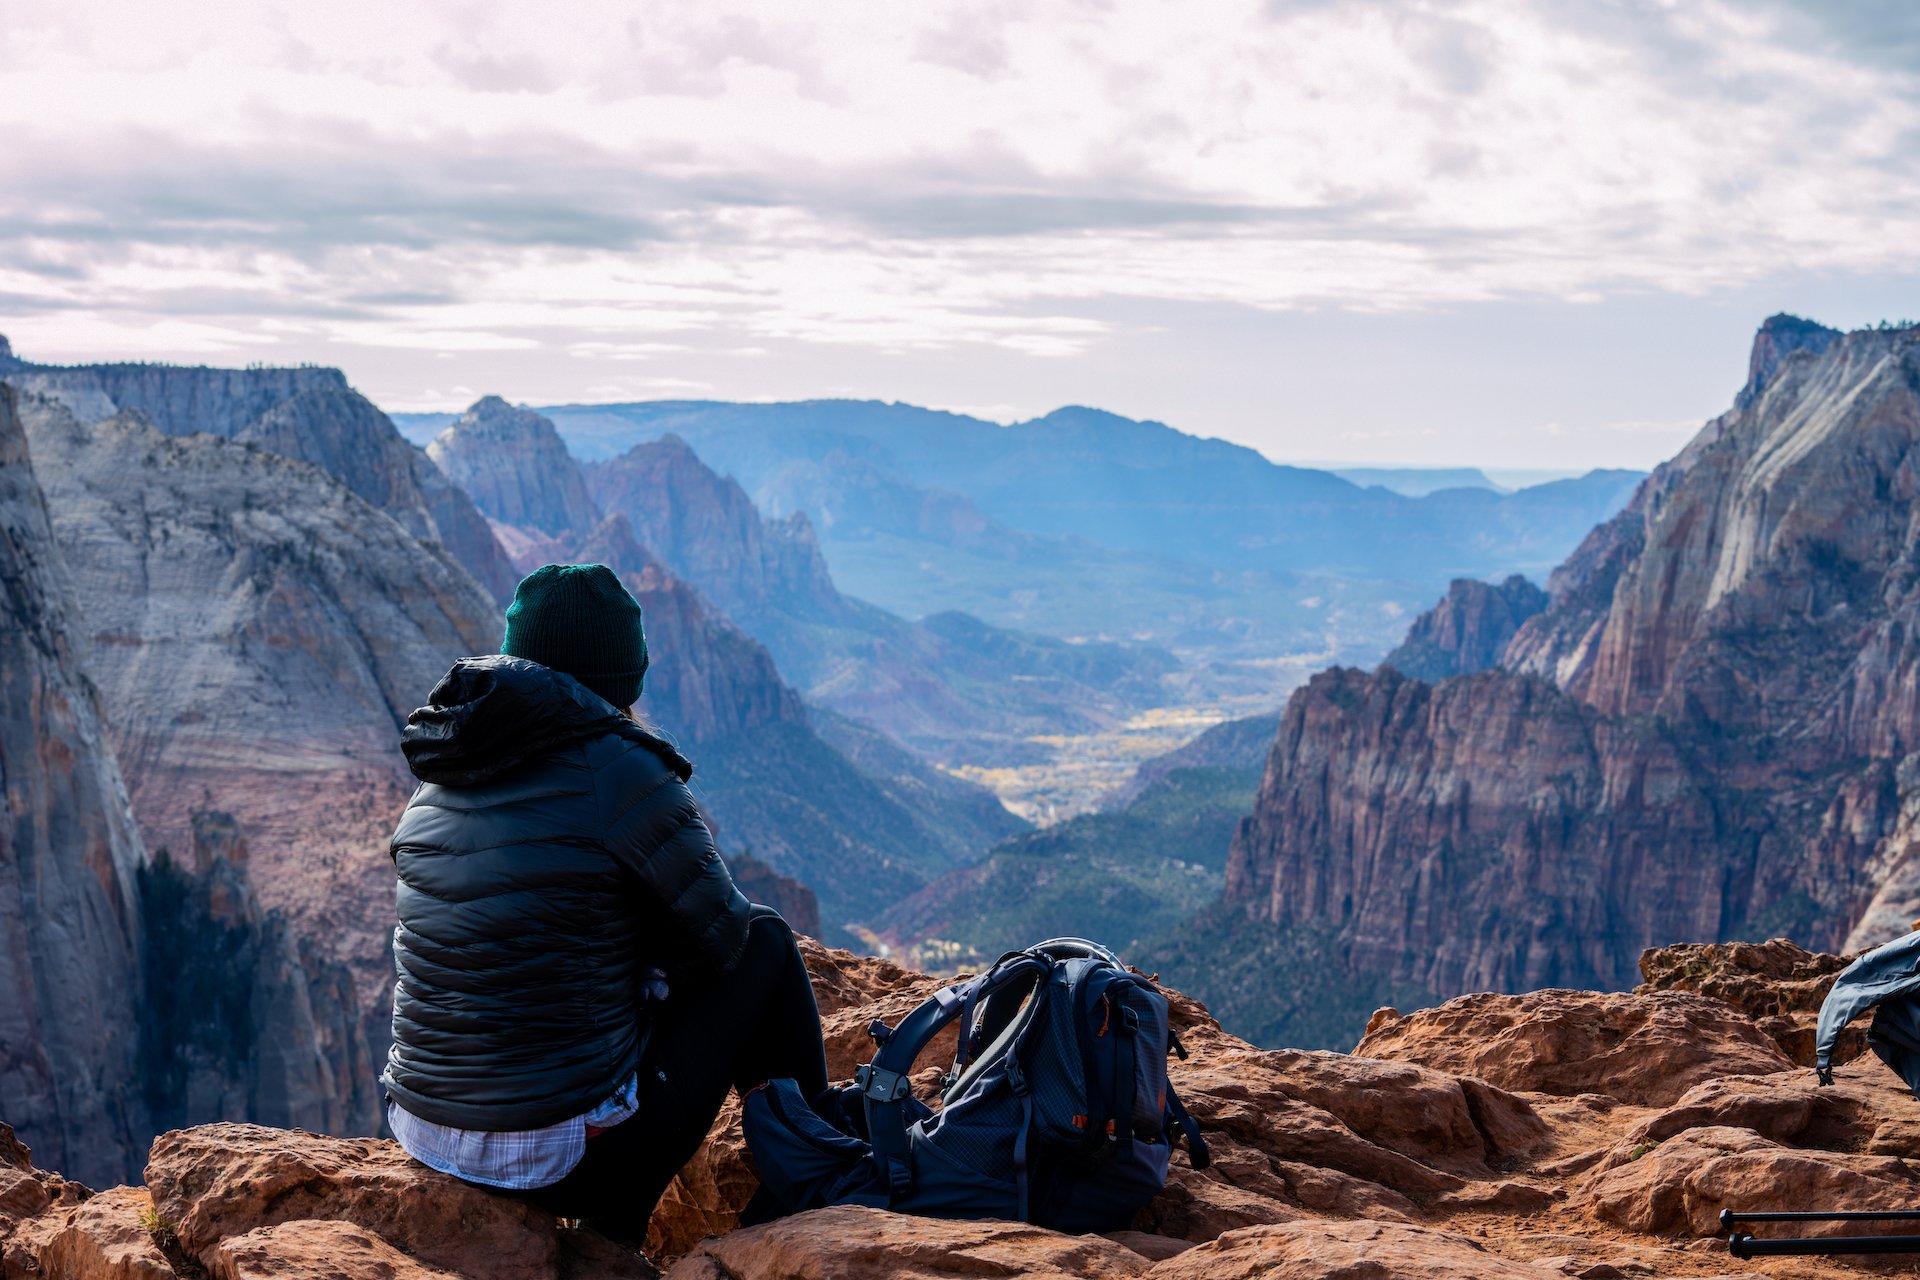
Observation Point is arguably the best view of the park. You can see for miles through the canyon and can watch the tiny little dots climb up Angel’s Landing below. We would have tried out the popular East Rim Trail Connection that leads to Observation Point, but it has been closed since 2019 due to significant damage to the trail from rockfalls. Instead, we took the opportunity to enjoy a drive through the famous Carmel Tunnel to the trailhead of East Mesa Trail. I rate this trail as moderate due to length and some elevation gain.
Experience:
We were a little bummed that the East Rim Connection was closed because we were ready for another challenging hike with rewarding views after Angel’s Landing. However, this was the last day of our trip, and we had done a ton of hiking. We were both pretty sore, and it was also Thanksgiving Day, so we wanted to get back to the Zion Lodge in time to claim our Thanksgiving Dinner. So honestly, this alternative turned out to be perfect.
We drove through the Carmel Tunnel which was an amazing experience in itself (especially coming back), and parked at the East Mesa Trailhead. The road leading to it became pretty bumpy and washed out, so I was thankful we rented a Crossover instead of a Sedan. We started off on the trail and hiked quite a ways before experiencing the gorgeous views. At one point, we stopped to take a picture at an overlook just before Observation Point, and I almost accidentally hurled myself off the canyon ledge. Ethan dropped a lens cap and instinctively called out for me get it. I wasn’t really thinking and just reacted to chase it. I caught it but then looked down at my boots and how close they were to the ledge. I turned around and Ethan’s eyes were almost as big as mine. His mouth was agape and his expression read, “Oh shit. My wife almost died for a lens cap.” I scrambled away from the ledge, and we both started laughing. We went a little further and made it to Observation Point. I put my gear down and immediately sat down because I knew I wanted to take in this view for a good while. It was unbelievable.
Tips:
Get to the trail early. Parking is limited.
Take a vehicle that can handle rough, dirt roads.
Enjoy Carmel Tunnel.
Bring a camera! The view is too beautiful to not grab a picture.
The Zion National Park shuttle does not service this trail
Which Zion hike speaks to you?

Credit to AllTrails for information about distance, elevation gain, and some trail connection names since I didn’t memorize and remember those details from our trip almost three years ago.
Ethan made a video about our time in Zion National Park. You can click the button above to check it out!